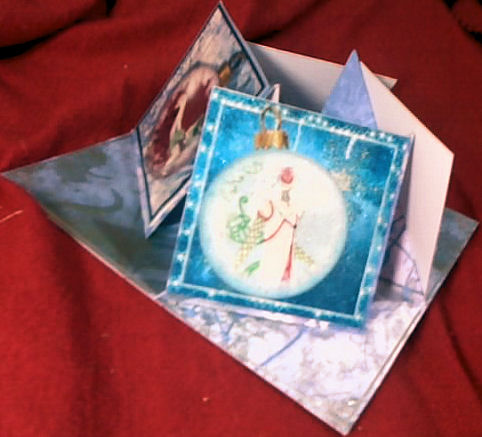
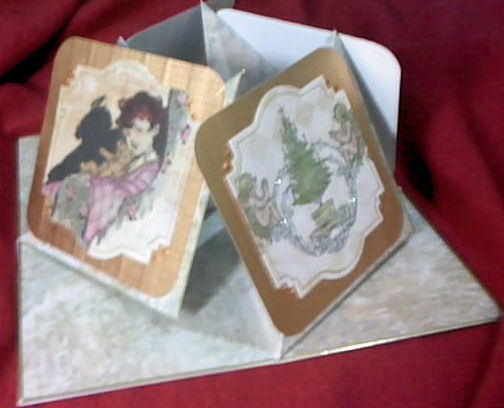
Well I was up late last night, and meant to blog this one this morning before the shows on QVC, but I was too tired and went back to bed!! Sorry!
This is the last one I have done, using those fabulous Toppers by My Craft Studio that sold out so quickly. I don't have to worry though as I ordered mine, lol, and a couple of other bits to play with!
This is using one of the large rectangle foiled/mirri'd toppers.
This kit has thoroughly stumped me! I love them, and I think all the other colours are as stunning as the Red, which I got, if not better!
This is an 8x8" card blank made from 300gsm A3 dark green card. The matt is using the Cheery Lynn Royal coved Rectangles Mega doily die, which I cut on my Happy Cut and no shims. As far as I know the Happy Cut is the Only machine able to do this without breaking. This is on a 350gsm Hammered White Card stock.
I cut a circle from the base card which comes with the kit, as I know now, and split it in half, separating the halves so that I could wrap the Sublime Metallic Twine round the gap, using the die cut as a means of keeping it straight. Next up the topper was placed over the top, using DST.
Now I needed to pull the green from the card base back into the design, so I used the last 3 of those scrummy Silver Rose hips (yes I ordered those as well lol) in my kit, and added a green leaf, as the silver reflects the silver in the die cut. Last but not least, 3 large clear gems in the remaining corners, and Job's a gud 'un!
If you didnt get chance to order them, or thought they were'nt for you, if you know someone who has got them, go and have a peep, they are so much better than any photo or camera work can show.
I have gone off kits recently, preferring to create my own designs, but I can honestly say that these toppers are so very unique, that I had to get them. The quality is superb, better than anything I have ever seen, and up until January I was a Hunky Dory Fanatic, and Kanban kit fanatic, so that is saying something! The designs are lovely. I didnt buy much from QVC due to the postage rates, but I bought what I would have kicked my self for missing out on, these toppers, the flowers and the moulds.
Hopefully I have given you inspiration over the past few days in how to use these bits I was given, and if you did get them, I would love to be able to pop along and gain inspiration from you in return.
Hugs to all
Lou
Card and paper crafting keeps me sane! But this is now mainly a Vlog, due to Eyesight issues. Please feel free to use my designs for inspiration Purposes, but do not Directly copy, or pass my work off as your own. I would rather inspire, than be "flattered" by copying, xx
Pages
If you like my blog please Follow, and I'll hop along and return the favour
Showing posts with label Happy Cut by Artemio. Show all posts
Wednesday, May 30, 2012
Tuesday, April 24, 2012
La Fee Verte by Mitzi Sato-Wiuff
Another Scrapbook Stamp Society DT card from me, as I have loads in the pipeline so to speak, lol. This one's a beautiful Image by Mitzi Sato-Wiuff La Fee Verte, though I have no idea what that exactly means in french, verte is definitely green, Fee I suppose is a Fairy, but I'm not sure lol, but anyway, it is a stunner, and a lovely complex design, that you can loose yourself in for quite some time.
Which is exactly what I did! This card has been in the making for about 2 weeks, not because it was hard to do, but I did take my time over it as there were things I wanted to try, and then of course I lost my hard drive, so now I have a crate of disks sitting here waiting to be loaded onto a new hard drive, I lost 850GB in the crash, so its going to be a long time getting everything back on!!
But back to the card.
Base card I made 8x8" in Centura pearl.
Butterflies were cut on the Happy Cut, using the Butterfly die that came with the machine, from a mega pack of 12x12" papers by K&Co,
Base paper is a design by William Morris, Rabbit something. I cant tell you which one it is as the name is on the back of the paper, lol.
Base Matt is a Cloud design by Kanban.
Dark green paper as a top Matt.
Digi Stamp by Mitzi Sato-Wiuff.
I duplicated the fairy figure in My Craft Studio, as I knew exactly what I was intending to do with it.
But this design was a bit of a step into unknown territory for me..........my thinking: Butterflies have brown or black bodies.........so the body for the wings ..........lets try a darker skin tone than I am used to........
I dont know if I got the skin tone right, I think I have. But I'm not definite, as its the first time, I have tried it.
The main base image and the duplicated fairy were all coloured with the same promarkers...
Pine, Forest Green, Lime green, Fresh Meadow, Indgio Blue, Sky Blue, Cobalt Blue, Arctic Blue, Amythyst, Orchid, Fuchia Pink, Dusky Rose, Rose Pink, Antique Pink, Ruby, Sunkissed Pink, Pale Pink, Sandstone, Cocoa, Cinamon, Chestnut.
Then I used a silver Sakura Pen for the decoration on the dress, and used versamark and clear embossing powder to glaze the fairy. I fixed her on top of the original with some clear glue. I deliberately left some of the edge of her dress trailing outside the main Image, to draw the veiwer in.
I hope you like it, xxx
Lou
I am entering this in the following Challenges:
http://thepapershelter.blogspot.co.uk/ Wings and things
http://onestitchatatimechallenge.blogspot.co.uk/ AnYthing Goes
http://stamptacularsundaychallenge.blogspot.co.uk/ 3 Layers or More
http://lovetocreatechallenge.blogspot.co.uk/ Anything Goes
http://www.vostamps.blogspot.co.uk/ Anything Goes
http://promarkerchallenge.blogspot.co.uk/2012/04/week-146-theme.html Cut it out week 146
Which is exactly what I did! This card has been in the making for about 2 weeks, not because it was hard to do, but I did take my time over it as there were things I wanted to try, and then of course I lost my hard drive, so now I have a crate of disks sitting here waiting to be loaded onto a new hard drive, I lost 850GB in the crash, so its going to be a long time getting everything back on!!
But back to the card.
Base card I made 8x8" in Centura pearl.
Butterflies were cut on the Happy Cut, using the Butterfly die that came with the machine, from a mega pack of 12x12" papers by K&Co,
Base paper is a design by William Morris, Rabbit something. I cant tell you which one it is as the name is on the back of the paper, lol.
Base Matt is a Cloud design by Kanban.
Dark green paper as a top Matt.
Digi Stamp by Mitzi Sato-Wiuff.
I duplicated the fairy figure in My Craft Studio, as I knew exactly what I was intending to do with it.
But this design was a bit of a step into unknown territory for me..........my thinking: Butterflies have brown or black bodies.........so the body for the wings ..........lets try a darker skin tone than I am used to........
I dont know if I got the skin tone right, I think I have. But I'm not definite, as its the first time, I have tried it.
The main base image and the duplicated fairy were all coloured with the same promarkers...
Pine, Forest Green, Lime green, Fresh Meadow, Indgio Blue, Sky Blue, Cobalt Blue, Arctic Blue, Amythyst, Orchid, Fuchia Pink, Dusky Rose, Rose Pink, Antique Pink, Ruby, Sunkissed Pink, Pale Pink, Sandstone, Cocoa, Cinamon, Chestnut.
Then I used a silver Sakura Pen for the decoration on the dress, and used versamark and clear embossing powder to glaze the fairy. I fixed her on top of the original with some clear glue. I deliberately left some of the edge of her dress trailing outside the main Image, to draw the veiwer in.
I hope you like it, xxx
Lou
I am entering this in the following Challenges:
http://thepapershelter.blogspot.co.uk/ Wings and things
http://onestitchatatimechallenge.blogspot.co.uk/ AnYthing Goes
http://stamptacularsundaychallenge.blogspot.co.uk/ 3 Layers or More
http://lovetocreatechallenge.blogspot.co.uk/ Anything Goes
http://www.vostamps.blogspot.co.uk/ Anything Goes
http://promarkerchallenge.blogspot.co.uk/2012/04/week-146-theme.html Cut it out week 146
Wednesday, March 28, 2012
10,000 Views
Wow I have had over 10,000 views of my page!! I cant quite believe that figure, thats huge, Thank you everyone, xxx
just a quickie, as I have done yet another video, this time to do with the New Cheery Lynn Mega Doily dies, and the Happy cut!!
so I hope you'll have a look, I will be posting more later, but I have some DT work to do, right now, and then some awards people have sent me need to be posted as well lol, I havent forgotten ladies I promise, xxx
just a quickie, as I have done yet another video, this time to do with the New Cheery Lynn Mega Doily dies, and the Happy cut!!
so I hope you'll have a look, I will be posting more later, but I have some DT work to do, right now, and then some awards people have sent me need to be posted as well lol, I havent forgotten ladies I promise, xxx
Friday, March 16, 2012
The most stunning Image...SSS DT card
The Animal Kingdom is the Challenge over at The Scrapbook Stamp Society Blog, this week, and I chose a stunning image by Mitzi Sato-Wiuff.
This is a Stunning Piece of work, and is a LARGE image in itself, as it is so detailed. I printed it out just slightly smaller than A4, so you can now Gauge the size of the card.
Promarkers AGAIN, to the rescue, and I took my time over it, I did it in sections, and it took about 3 days to finish, but worth the time I think.
I didn't want to have an ordinary background to the image, as there is in reality, little chance of this image coming to pass, so I removed the blank areas, and mounted the image onto some Oil effect card.
Next I needed a frame...........so the question was then how to achieve the effect I wanted. So I borrowed an Idea from Wendy at Create and Craft, and created a sort of dropped shelf inside the card.
So now I have something to use as a frame, I just had to decorate it! I got out my Happy Cut, well in all honesty, I didnt get it out as such, I just picked it up from under the table lol, it doesn't weigh much more than a Cuttlebug, (which is always good when you are in danger of dislocating your wrists!) and some Spell Binders flower dies and cut through 8 layers of tissue paper in one pass. I then decided to add leaves, so collected 2 shades of Yellow, and 3 shades of green, and ran those through as well. I layered it all up and added them to the Frame. I used yellow gems for the inside of the flowers, and a gold Gel pen for the inside of the flowers on the main picture.
I used some Ranger Colour coredinations cardstock, and cut a small sliver which I embossed with the Cuttlebug Organic Flourish folder, and sanded it back, and fixed it to the front base of the card.
I LOVE this image its an absolute delight! and I love the card it has created!
Why dont you pop over to the Shop and have a nosey. There is likely to be images that you recognise in there, as these ladies and gents are well established artists who have designed for years, even doing Book artwork, and Galleries. Let me know which are your favourites, xx
This is a Stunning Piece of work, and is a LARGE image in itself, as it is so detailed. I printed it out just slightly smaller than A4, so you can now Gauge the size of the card.
Promarkers AGAIN, to the rescue, and I took my time over it, I did it in sections, and it took about 3 days to finish, but worth the time I think.
I didn't want to have an ordinary background to the image, as there is in reality, little chance of this image coming to pass, so I removed the blank areas, and mounted the image onto some Oil effect card.
Next I needed a frame...........so the question was then how to achieve the effect I wanted. So I borrowed an Idea from Wendy at Create and Craft, and created a sort of dropped shelf inside the card.
So now I have something to use as a frame, I just had to decorate it! I got out my Happy Cut, well in all honesty, I didnt get it out as such, I just picked it up from under the table lol, it doesn't weigh much more than a Cuttlebug, (which is always good when you are in danger of dislocating your wrists!) and some Spell Binders flower dies and cut through 8 layers of tissue paper in one pass. I then decided to add leaves, so collected 2 shades of Yellow, and 3 shades of green, and ran those through as well. I layered it all up and added them to the Frame. I used yellow gems for the inside of the flowers, and a gold Gel pen for the inside of the flowers on the main picture.
I used some Ranger Colour coredinations cardstock, and cut a small sliver which I embossed with the Cuttlebug Organic Flourish folder, and sanded it back, and fixed it to the front base of the card.
I LOVE this image its an absolute delight! and I love the card it has created!
Why dont you pop over to the Shop and have a nosey. There is likely to be images that you recognise in there, as these ladies and gents are well established artists who have designed for years, even doing Book artwork, and Galleries. Let me know which are your favourites, xx
Friday, March 09, 2012
Oh I did a Video!!!
Oh dear me well that was a bit stress full!!
I have had questions about my Happy Cut machine, and making video's is something I have been thinking about for a while to do with DT work, and my own creations, so today I took the plunge and did my first you-tube video!
Now how do I get you lot to view it, and how to set up a new page with links to videos I will do in the future?
Happy Cut and Plates Video. Its the first of a series on the Happy cut, but it might be a bit on the quiet side, so please turn the volume up!! For some reason I cant get the sound to go any louder, as my PC has assigned it to Skype and wont let me change it around!!
Please let me know what you think, as I am really nervous now!!
xxx
Lou
I have had questions about my Happy Cut machine, and making video's is something I have been thinking about for a while to do with DT work, and my own creations, so today I took the plunge and did my first you-tube video!
Now how do I get you lot to view it, and how to set up a new page with links to videos I will do in the future?
Happy Cut and Plates Video. Its the first of a series on the Happy cut, but it might be a bit on the quiet side, so please turn the volume up!! For some reason I cant get the sound to go any louder, as my PC has assigned it to Skype and wont let me change it around!!
Please let me know what you think, as I am really nervous now!!
xxx
Lou
Monday, March 05, 2012
I was bored last night.........
..............and Mojo was being lazy, so I decided to do some cards I had purchased a while ago from Crafts U print. This particular one you can find Here, as it was 1386th on the list for Sue Douglas designs!!! Phew that took some finding I can tell you!!
I printed it out on some supersmooth card on my laser printer, so it has a nice sheen to it. Then I simply followed the instructions on the sheet to create the pyramage. I added a Pink Ribbon, and Bow, across the bottom of the card, before fixing it to a Base Pink Card stock.
I matted the Happy Birthday sentiment, onto a blank piece provided on the sheet, and mounted it on top of the Ribbon. I added 2 pink Gems in place of Brads and cut 4 small Butterflies from a Die by Artemio, makers of my beloved Happy Cut. I layered the butterflies in 2's and added some brilliant pink ultra fine glitter to the wings of the top layers, and mounted them with some silicon Glue for dimension. I added a bit of Fired Brick distress ink to the edge of the card for some definition, and then its was Job done. I really like how this turned out. It wasnt a creative card, but an exercise in construction as Mojo was being Lazy, and I like it, hope you do too
crafty hugs all round, xxx
I printed it out on some supersmooth card on my laser printer, so it has a nice sheen to it. Then I simply followed the instructions on the sheet to create the pyramage. I added a Pink Ribbon, and Bow, across the bottom of the card, before fixing it to a Base Pink Card stock.
I matted the Happy Birthday sentiment, onto a blank piece provided on the sheet, and mounted it on top of the Ribbon. I added 2 pink Gems in place of Brads and cut 4 small Butterflies from a Die by Artemio, makers of my beloved Happy Cut. I layered the butterflies in 2's and added some brilliant pink ultra fine glitter to the wings of the top layers, and mounted them with some silicon Glue for dimension. I added a bit of Fired Brick distress ink to the edge of the card for some definition, and then its was Job done. I really like how this turned out. It wasnt a creative card, but an exercise in construction as Mojo was being Lazy, and I like it, hope you do too
crafty hugs all round, xxx
Friday, March 02, 2012
SSS Design Team post
Well its getting to that time of the month when the new challenges are going live over at addicted-to-stamps and
Scrapbook Stamp Society, and have we got some challenges for you.......As well as some Changes.........
Blog Hop Candy!!!!
This works slightly differently to an ordinary Candy Give away, and there's the chance of some really yummy prizes. Firstly, they arent massive Hops. Each is kept quite small, so your not there forever. You have to go to Addicted to Stamps, follow the page, then join in the Hop, and say "Hi I am.... and Lou sent me". There are going to be some massive candy give aways on some of the hops, so join in the fun, to be in with a chance to win something yummy! Just remember to say who sent you!! Coz I get the chance at something yummy too!!
This week the theme is The Garden Patch, and this is my card for the week.........
Its from a Digi Stamp by Sue Miller, and is a wonderful Hippy Fairy dancing on a Flower. Isnt she cute?
I coloured the design with my Promarkers, adding some glitter to the birds and flower centre, and then trimmed the image to size. I wanted the body to stand out from the card, so I carefully ran a knife around the edge of the fairy, being careful not to cut her out completely, and added a bit of Blue mica around the edge of her body.
I was able to grab a few bargains at The Range, here in the UK, and got some packs of coredinations card stock, 80 sheets for £5.99, an absolute steal, so I rummaged through until I found one that matched the Blue Pearl Promarker, I had used.
I ran it through my Happy Cut with the Spellbinders Flowers Delight Impressabilities sheet, and sanded it back to reveal the core.
Then I used the Spell Binders Lattice Rectangles die to cut the sheet, extending it by leaving some of the card and die overhanging the base plate so it wouldn't cut, then matching the pattern and repeating the process.
I mounted the image and die cut onto some paper I had found in a water damaged book of William Morris designs, courtesy of my father, I have quite a few of these books, as he collected them at one stage, but some are water damaged so he gave them to me to use in my card making, Ta Dad, xx
I used the Blue Pearl Promarker to colour some White dotted ribbon, and the heads of 2 of the hat pins. I then fixed the ribbon to the back of the paper with some DST, and made a bow with the remnants. I cut the long shafts off the pins, and used Silicon Glue to fix the 3 pins, (One was left white,) and the bow. I also added a couple of butterflies to continue the Theme outside the main image, and draw the eye in to the picture.
Kids Always amaze me....just when I think I know something, they turn around and tell me something new.......firstly it was my eldest sons girl friend, telling me of her adoration of images by one of the Scrapbook Stamp Societies artists, this week it was my Daughter! We were driving along, and I was telling her all about the work I am doing for the Scrapbook Stamp Society, she was quite peeved with me as I had apparently neglected to say anything to her about it, oops, and I mentioned a Name of one of the Artists from SSS, she went potty at me!! It turns out that she has been following her work for quite some time, and adores the Fairy images by this artist, oops! She was introduced to the artists work by one of her teachers at secondary school.....about 8 yrs ago! I know that the artists have been around for quite awhile, but I didnt quite realise how well they are known, especially by the kids, sorry younger generations. Now you see I think of it like this if Boris came to SSS then I would be in Raptures, as I love Boris' work, and even have a huge Canvas of his work in my Hallway. But the kids are behaving exactly the same way as I would, in reaction to Names at SSS. I also know that there is some Hoohah going on, but I have done my research and my research is being re-enforced by the kids reactions, so if you are in doubt about it I would suggest researching the Names at SSS and find out for yourself who these people are..........You might be surprised.
While you are There why not have a look at the images, and tell me which is your favourite one?
So I am entering this card in the Following:
CCEE1209 Challenge http://cceestampers.blogspot.com/
http://cutecardthursday.blogspot.com/ Signs of Spring challenge
DYSU #61 THINGS WITH WINGS
http://www.dutchdare-cardchallenges.blogspot.com/ Tic Tac Toe, Flowers, Bling (pins) Distressing
http://just-hanna-stamps.blogspot.com/ Organic
Crafty Hugs all round,
xxx
Scrapbook Stamp Society, and have we got some challenges for you.......As well as some Changes.........
Blog Hop Candy!!!!
This works slightly differently to an ordinary Candy Give away, and there's the chance of some really yummy prizes. Firstly, they arent massive Hops. Each is kept quite small, so your not there forever. You have to go to Addicted to Stamps, follow the page, then join in the Hop, and say "Hi I am.... and Lou sent me". There are going to be some massive candy give aways on some of the hops, so join in the fun, to be in with a chance to win something yummy! Just remember to say who sent you!! Coz I get the chance at something yummy too!!
This week the theme is The Garden Patch, and this is my card for the week.........
Its from a Digi Stamp by Sue Miller, and is a wonderful Hippy Fairy dancing on a Flower. Isnt she cute?
I coloured the design with my Promarkers, adding some glitter to the birds and flower centre, and then trimmed the image to size. I wanted the body to stand out from the card, so I carefully ran a knife around the edge of the fairy, being careful not to cut her out completely, and added a bit of Blue mica around the edge of her body.
I was able to grab a few bargains at The Range, here in the UK, and got some packs of coredinations card stock, 80 sheets for £5.99, an absolute steal, so I rummaged through until I found one that matched the Blue Pearl Promarker, I had used.
I ran it through my Happy Cut with the Spellbinders Flowers Delight Impressabilities sheet, and sanded it back to reveal the core.
Then I used the Spell Binders Lattice Rectangles die to cut the sheet, extending it by leaving some of the card and die overhanging the base plate so it wouldn't cut, then matching the pattern and repeating the process.
I mounted the image and die cut onto some paper I had found in a water damaged book of William Morris designs, courtesy of my father, I have quite a few of these books, as he collected them at one stage, but some are water damaged so he gave them to me to use in my card making, Ta Dad, xx
I used the Blue Pearl Promarker to colour some White dotted ribbon, and the heads of 2 of the hat pins. I then fixed the ribbon to the back of the paper with some DST, and made a bow with the remnants. I cut the long shafts off the pins, and used Silicon Glue to fix the 3 pins, (One was left white,) and the bow. I also added a couple of butterflies to continue the Theme outside the main image, and draw the eye in to the picture.
Kids Always amaze me....just when I think I know something, they turn around and tell me something new.......firstly it was my eldest sons girl friend, telling me of her adoration of images by one of the Scrapbook Stamp Societies artists, this week it was my Daughter! We were driving along, and I was telling her all about the work I am doing for the Scrapbook Stamp Society, she was quite peeved with me as I had apparently neglected to say anything to her about it, oops, and I mentioned a Name of one of the Artists from SSS, she went potty at me!! It turns out that she has been following her work for quite some time, and adores the Fairy images by this artist, oops! She was introduced to the artists work by one of her teachers at secondary school.....about 8 yrs ago! I know that the artists have been around for quite awhile, but I didnt quite realise how well they are known, especially by the kids, sorry younger generations. Now you see I think of it like this if Boris came to SSS then I would be in Raptures, as I love Boris' work, and even have a huge Canvas of his work in my Hallway. But the kids are behaving exactly the same way as I would, in reaction to Names at SSS. I also know that there is some Hoohah going on, but I have done my research and my research is being re-enforced by the kids reactions, so if you are in doubt about it I would suggest researching the Names at SSS and find out for yourself who these people are..........You might be surprised.
While you are There why not have a look at the images, and tell me which is your favourite one?
CCEE1209 Challenge http://cceestampers.blogspot.com/
http://cutecardthursday.blogspot.com/ Signs of Spring challenge
DYSU #61 THINGS WITH WINGS
http://www.dutchdare-cardchallenges.blogspot.com/ Tic Tac Toe, Flowers, Bling (pins) Distressing
http://just-hanna-stamps.blogspot.com/ Organic
Crafty Hugs all round,
xxx
Thursday, March 01, 2012
Paper Crafting Journey DT card, Anythign Goes
Well its that time again, another Challenge over at Paper Crafting Journey. I must admit it was really hard to choose an image from The Paper Shelter, as they provided us with some absolute stunners! The prize this week is a $20 gift certificate for Paper Shelter images, and they have some Wowzers.
I chose the Rapunzel image for mine, as I had an idea, and something I wanted to use.......
The Paper Shelter offered us coloured images, digi stamps, and backing papers to work with, so if your "no good" at colouring, you still have some nice images to use, which is always a bonus!!
I am reasonable at colouring, mind you I wasn't at school, and I got my Promarkers out and coloured Rapunzel in. I used the Lattice Rectangle Die from Spell Binders, and when I was colouring the wall in I knew exactly what I was going to use.... the other half of Hubby's Lager can!. I had embossed and coloured it a few weeks ago, I was just waiting for the right card to come along!
I used copper and Gold Tim Holtz alcohol inks on the can, and embossed it with the Funky Poinsettia embossing folder by Craft Concepts.
I wanted the backing paper to form the sky behind the tower, and mounted the can with some Silicon glue. Then it was a simple matter to mount Rapunzel in front of the can, and all that remained was to Bling the backing paper a bit, with some Blue Glitter, and some tiny gems. The bow along the top is part of the design by The Paper Shelter.
I do like this image, and suspect a lot of others do too! You can get it by clicking on the Link, and dont forget to link your creations for Anything Goes over at Paper Crafting Journey for the chance to win the $20 gift certificate.
This is entered in the Following:
http://craftuscrazy.blogspot.com/, a lovely childs bed as inspiration, used Colours, and childrens bed time
http://sarahhurleychallenges.blogspot.com/ Birthday Celebrations
http://www.southerngirlschallenge.blogspot.com/ Challenge #39
http://thepapervariety.blogspot.com/p/challenge-entries.html Tic Tac Toe, Emboss, Create a card, include a die cut
xxx
I chose the Rapunzel image for mine, as I had an idea, and something I wanted to use.......
The Paper Shelter offered us coloured images, digi stamps, and backing papers to work with, so if your "no good" at colouring, you still have some nice images to use, which is always a bonus!!
I am reasonable at colouring, mind you I wasn't at school, and I got my Promarkers out and coloured Rapunzel in. I used the Lattice Rectangle Die from Spell Binders, and when I was colouring the wall in I knew exactly what I was going to use.... the other half of Hubby's Lager can!. I had embossed and coloured it a few weeks ago, I was just waiting for the right card to come along!
I used copper and Gold Tim Holtz alcohol inks on the can, and embossed it with the Funky Poinsettia embossing folder by Craft Concepts.
I wanted the backing paper to form the sky behind the tower, and mounted the can with some Silicon glue. Then it was a simple matter to mount Rapunzel in front of the can, and all that remained was to Bling the backing paper a bit, with some Blue Glitter, and some tiny gems. The bow along the top is part of the design by The Paper Shelter.
I do like this image, and suspect a lot of others do too! You can get it by clicking on the Link, and dont forget to link your creations for Anything Goes over at Paper Crafting Journey for the chance to win the $20 gift certificate.
This is entered in the Following:
http://craftuscrazy.blogspot.com/, a lovely childs bed as inspiration, used Colours, and childrens bed time
http://sarahhurleychallenges.blogspot.com/ Birthday Celebrations
http://www.southerngirlschallenge.blogspot.com/ Challenge #39
http://thepapervariety.blogspot.com/p/challenge-entries.html Tic Tac Toe, Emboss, Create a card, include a die cut
xxx
Friday, February 24, 2012
Happy Cut Update, and they are soon to be in stock!
Hi guys,
Well was a bit perturbed by a comment on my Blog, from a lady who also loves her Happy Cut. She was under the impression that Samuel Taylors had stopped stocking the Happy Cut, as it had been removed from the website at http://www.clickoncrafts.co.uk/, Samuel Taylors online branch.
I was that upset by the idea that Samuel Taylors had stopped selling it that I phoned them up! I got the very nice Manageress who explained that it had been removed from the site due to the fact that they had none left in stock BUT they are due to arrive at any moment!!
20 of them!! I know that 2 ladies are currently waiting for them to arrive, so if you want one I would suggest phoning to see wether they are in yet, I will be phoning her tomorrow to tell her to put the info UP on the Website, and order more!!!
29th Feb Update: Okay they are in stock currently, the website is a bit glitchy, and I was told earlier on that someone had purchased then it showed out of stock, as soon as she paid for it. I have queried Samuel Taylors, its just a glitch, there are some left as of today 29th feb, so dont hang around if you want one. If in doubt you can always give the ladies a ring, they are very helpful
Well was a bit perturbed by a comment on my Blog, from a lady who also loves her Happy Cut. She was under the impression that Samuel Taylors had stopped stocking the Happy Cut, as it had been removed from the website at http://www.clickoncrafts.co.uk/, Samuel Taylors online branch.
I was that upset by the idea that Samuel Taylors had stopped selling it that I phoned them up! I got the very nice Manageress who explained that it had been removed from the site due to the fact that they had none left in stock BUT they are due to arrive at any moment!!
20 of them!! I know that 2 ladies are currently waiting for them to arrive, so if you want one I would suggest phoning to see wether they are in yet, I will be phoning her tomorrow to tell her to put the info UP on the Website, and order more!!!
29th Feb Update: Okay they are in stock currently, the website is a bit glitchy, and I was told earlier on that someone had purchased then it showed out of stock, as soon as she paid for it. I have queried Samuel Taylors, its just a glitch, there are some left as of today 29th feb, so dont hang around if you want one. If in doubt you can always give the ladies a ring, they are very helpful
Friday, February 10, 2012
Got loads to blog..part 1
Okay, I have been too busy creating and not enough blogging!! So I now have 6 that I can blog, and others that I cant just yet!
Hubby got himself 4 more cans of Lager tonight, so I now have 2 empty and cut open cans to play with later...., but in the meantime, in true Blue peter fashion....
Here's one I prepared earlier:
Okay this one looks unfinished, and to a certain extent it is, but I have had lots of bad experience in the past of people liking the card, but its for the wrong person, eg mum, when they want it for a best friend, so Now I have got into the habit, of leaving most blank, until they are needed.
This was the other half of the lager Can experiment. I tried embossing it using a mask, but it didnt take too well, so I embossed it with a Papermania embossing Folder, Silent Night, and applied some alcohol inks. Then I took some plain white flowers from my stash and coloured them Ruby red and orange with my promarkers, added a Leaf, and then proceeded to assemble the base.
I took some A4 Pearlised paper in Burgundy, and used the Pronty A4 Plastic mask Flourishes, and Embossed it in My Happy Cut. Added some Gold and Red twisted cord, that I got from a Pound shop on the run up to Christmas, and unraveled the ends to make it like down Flat so I could tape it to the base Burgundy card.
A day later I Managed to finish the card off.........
I got a Leane Creatief Die the other day, and must say I really like it. Its very delicate, and has a main frame with leaves, and various matted layers inside, down to the absolutely TINY! I took some Gold Mirri, and some Burgundy card stock, and cut a frame from each, interlinking the 2 frames, so that they swap positions on the right hand side. I used the first Mat layer created by the frame die, on the Mirri, and then Cut the next layer Mat in Cream pearlised paper. I stamped the greeting in Rocket Red Brilliance ink, and BOY is that a juicy pad!, and then embossed with some red detail powder. I slipped the sentiment Under the twisted cord, and mounted the frame over the cord, Done.
Right need to go sort out the photos for the rest that need to be blogged back soon........
xx
Lou
Hubby got himself 4 more cans of Lager tonight, so I now have 2 empty and cut open cans to play with later...., but in the meantime, in true Blue peter fashion....
Here's one I prepared earlier:
Okay this one looks unfinished, and to a certain extent it is, but I have had lots of bad experience in the past of people liking the card, but its for the wrong person, eg mum, when they want it for a best friend, so Now I have got into the habit, of leaving most blank, until they are needed.
This was the other half of the lager Can experiment. I tried embossing it using a mask, but it didnt take too well, so I embossed it with a Papermania embossing Folder, Silent Night, and applied some alcohol inks. Then I took some plain white flowers from my stash and coloured them Ruby red and orange with my promarkers, added a Leaf, and then proceeded to assemble the base.
I took some A4 Pearlised paper in Burgundy, and used the Pronty A4 Plastic mask Flourishes, and Embossed it in My Happy Cut. Added some Gold and Red twisted cord, that I got from a Pound shop on the run up to Christmas, and unraveled the ends to make it like down Flat so I could tape it to the base Burgundy card.
A day later I Managed to finish the card off.........
I got a Leane Creatief Die the other day, and must say I really like it. Its very delicate, and has a main frame with leaves, and various matted layers inside, down to the absolutely TINY! I took some Gold Mirri, and some Burgundy card stock, and cut a frame from each, interlinking the 2 frames, so that they swap positions on the right hand side. I used the first Mat layer created by the frame die, on the Mirri, and then Cut the next layer Mat in Cream pearlised paper. I stamped the greeting in Rocket Red Brilliance ink, and BOY is that a juicy pad!, and then embossed with some red detail powder. I slipped the sentiment Under the twisted cord, and mounted the frame over the cord, Done.
Right need to go sort out the photos for the rest that need to be blogged back soon........
xx
Lou
Thursday, February 02, 2012
Morgan Fitzsimons Kittens Valentines card
Well its that time of the week again, when it seems that all my DT work seems to get posted on the same day, I dont know, you hear nothingness from me for days then suddenly, whoosh! I am constantly popping up in your Blog list!! So this ones a DT card for Scrapbook Stamp Society.
So to the reason for this post..............
2 little cuties!!
I love this image, so versatile, and although this is supposed to be Valentines, I think it will do very nicely for the birth of Twins, or a wedding! Just change the colour scheme!
I started with the main digi stamp which you can get Here.
I imported it into one of my graphics programs, and copied the design, and removed the inside of the heart, then I copied the copy! So I had 2 frames and one full image.
I printed them off onto a sheet of A4 supersmooth paper, and attacked them with my heat gun, to cure the ink, as I was going to use promarkers with them. Its important when using an Alcohol base pen to make sure that the ink is completely dry from an ink based printer, as the alcohol can smudge the lines if your not careful, so leave it for 24 hrs before using, or cheat like I do, and heat it with the heat gun!
So I set to with the colouring. The frame on the main image just had the 2 colours that I was going to use on the top 2 layers, no colouring on the frame for that one, as I was only going to cover it up!, and then I started to work on the main image and those cute little Kittens. I ummed and Ahh'ed over wether to make one a Tricolour, ginger Tom, Ginger and white, and in the end settled for a ginger and white, bot, and a tabby girl, as you can just see the bow peeking out from under her chin. Some of the colouring is very fine, and I have some lovely ultra fine nibs for my Promarkers which make life an awful lot easier!
I added some glittered glue to the flowers on the main image, added a yellow background to them, and a green cushion for them to sleep on.
Next up was to deal with the 2 Heart frames, the first one I trimmed inside the original lines,so that it is narrower than the base image frame, to provide more depth and dimension, and and used 3 shades of green to wipe around the frame with.
Then I turned my attention to the final layer for the frame. I carefully coloured the flowers and leaves in, and proceeded to cut the floral centre from the rest of the frame. Once that was done, I used a clear embossing padf all over it, and applied some clear embossing powder, which was heated with a heat gun, until it melted and turned opaque like a varnish. I left it to cool and did the same again. for the last coat I used a clear Holographic embossing powder so it glimmers when it catches the light.
I then carefully layered the frame up, using small sticky pads for the first layer, and a clear silicon glue for the last, as it is too narrow to use sticky pads with.
Now to the card base....... I have a Happy Cut by Artemio, an alternative to the Grand Calibur, by Spellbinders. It is an A4 Die cutter, which comes with all the necessary plates, , and seems to be a white version of the Joy Trouvaille, but better made. So I took a 5x5" square Card base, and used a Pronty A4 embossing sheet, Flowers, on it with the Happy Cut. I do have several large embossing sheets, and the Pronty ones are new to me, they only arrived yesterday, but they work a treat!!
So I had a card base embossed with the floral design, next step was to stencil some Tim Holtz distress stain, Fired Brick, through the design, then fold the card over and create the twisted easel, line the embossing sheet up on the debossed side and repeat.
I used the Spellbinders Spiral Blossom 2 die on some, plastic backed fabric, and created a flower by rolling the strip round and round, then letting it relax a bit before gluing the spiral to the base, which was then glued onto the base of the card as a stopper.
I used a Leane Creatief Lea-abilities 001 die on some green card stock, and cut the leaves from the frame, and drew some veins on them with an Ultra fine nibbed promarker, and inserted them underneath the flower, and across the card. A touch of Glittered glue on the flower, and its as you see it. Finished.
Told you this was a wordy post those of you who have made it here from Scrapbook Stamp Society, hope you like what I did, and that you will pop to the shop, and grab the kittens for yourself,
I am entering this in the following Challenges:
Anything goes : To the one I love
Divas by design Anything goes
Happy Daze a Technique you love to use
Moving along with the times Have a Heart
Lou
xxx
So to the reason for this post..............
2 little cuties!!
I love this image, so versatile, and although this is supposed to be Valentines, I think it will do very nicely for the birth of Twins, or a wedding! Just change the colour scheme!
I started with the main digi stamp which you can get Here.
I imported it into one of my graphics programs, and copied the design, and removed the inside of the heart, then I copied the copy! So I had 2 frames and one full image.
I printed them off onto a sheet of A4 supersmooth paper, and attacked them with my heat gun, to cure the ink, as I was going to use promarkers with them. Its important when using an Alcohol base pen to make sure that the ink is completely dry from an ink based printer, as the alcohol can smudge the lines if your not careful, so leave it for 24 hrs before using, or cheat like I do, and heat it with the heat gun!
So I set to with the colouring. The frame on the main image just had the 2 colours that I was going to use on the top 2 layers, no colouring on the frame for that one, as I was only going to cover it up!, and then I started to work on the main image and those cute little Kittens. I ummed and Ahh'ed over wether to make one a Tricolour, ginger Tom, Ginger and white, and in the end settled for a ginger and white, bot, and a tabby girl, as you can just see the bow peeking out from under her chin. Some of the colouring is very fine, and I have some lovely ultra fine nibs for my Promarkers which make life an awful lot easier!
I added some glittered glue to the flowers on the main image, added a yellow background to them, and a green cushion for them to sleep on.
Next up was to deal with the 2 Heart frames, the first one I trimmed inside the original lines,so that it is narrower than the base image frame, to provide more depth and dimension, and and used 3 shades of green to wipe around the frame with.
Then I turned my attention to the final layer for the frame. I carefully coloured the flowers and leaves in, and proceeded to cut the floral centre from the rest of the frame. Once that was done, I used a clear embossing padf all over it, and applied some clear embossing powder, which was heated with a heat gun, until it melted and turned opaque like a varnish. I left it to cool and did the same again. for the last coat I used a clear Holographic embossing powder so it glimmers when it catches the light.
I then carefully layered the frame up, using small sticky pads for the first layer, and a clear silicon glue for the last, as it is too narrow to use sticky pads with.
Now to the card base....... I have a Happy Cut by Artemio, an alternative to the Grand Calibur, by Spellbinders. It is an A4 Die cutter, which comes with all the necessary plates, , and seems to be a white version of the Joy Trouvaille, but better made. So I took a 5x5" square Card base, and used a Pronty A4 embossing sheet, Flowers, on it with the Happy Cut. I do have several large embossing sheets, and the Pronty ones are new to me, they only arrived yesterday, but they work a treat!!
So I had a card base embossed with the floral design, next step was to stencil some Tim Holtz distress stain, Fired Brick, through the design, then fold the card over and create the twisted easel, line the embossing sheet up on the debossed side and repeat.
I used the Spellbinders Spiral Blossom 2 die on some, plastic backed fabric, and created a flower by rolling the strip round and round, then letting it relax a bit before gluing the spiral to the base, which was then glued onto the base of the card as a stopper.
I used a Leane Creatief Lea-abilities 001 die on some green card stock, and cut the leaves from the frame, and drew some veins on them with an Ultra fine nibbed promarker, and inserted them underneath the flower, and across the card. A touch of Glittered glue on the flower, and its as you see it. Finished.
Told you this was a wordy post those of you who have made it here from Scrapbook Stamp Society, hope you like what I did, and that you will pop to the shop, and grab the kittens for yourself,
I am entering this in the following Challenges:
Anything goes : To the one I love
Divas by design Anything goes
Happy Daze a Technique you love to use
Moving along with the times Have a Heart
Lou
xxx
Tuesday, January 31, 2012
Jem's Designs, 1
Right just recently, I have obtained quite a few Jem's Designs Cd's, and this is one of the Oldies I got from Jems designs.
This one's from the Elegant Beauties CD. Now I have run out of A4 Gloss card, so am having to resort to using supersmooth at the moment, the reason I say this is that the designs look outstanding on gloss card, and I really need to pop to Costco one day and pick up a new box. But beggars cant be choosers, and I wanted to play, and am lucky enough to have a colour Laser printer, which creates a nice but more muted sheen on supersmooth paper.
I wanted a shaped card for this, so dug out my Happy Cut, and Go Kreate XXL Fancy Frames die, and some dark red card stock, and cut a shaped A5 Card base, then folded half of the front back on itself. I used some red Mirri on the inside of the card, and matted the Backing paper onto it.
The front panel, is from the gatefold Sheet, and as I had already decoupaged it all I had to do was add some glitter on the swirls, and matt it onto the card.
I used a ribbon and some tags from the finishing sheet to finish the inside of the card, and I really like it.
Hugs
Lou
Tuesday, January 24, 2012
Wedding Card DT project
Well its getting to the time of year when those who are lucky enough to have romance in their lives (No Darling, playing Heavy Metal music to me doesn't really make the grade!), are starting to think about Flowers, Choccies, and all the nice things.
So the Challenge for this month over at Scrapbook Stamp Society is "Hearts and Flowers." I found this wonderful Digi-stamp by Morgan Fitzsimons. A really Beautiful digi, of a Human and an Elf, being romantic.
A friend of mine said to me the other day, that if she ever got married, she wouldn't want a picture of some other married couple, who looks nothing like her, on a card, which is what sent me down this track for this image, instead of the usual Valentine's card.
This isnt a complicated card, as its just a case of layering up, much easier when you have a large A4 Die-cutting machine, mines a Happy Cut, and some fabulous Spellbinders dies and embossing sheets.
I used some Water Colour paper, through my printer, to print the digi out, and then went at it with some Whispers pens, Mica Inks, and a Water Brush. I didnt want too many colours, as I wanted this quite serene, and calm, so left the clothing as the white paper, and just added touches of colour to the clothes, which makes the couple stand out from the background, instead of being lost in a riot of colour.
Yellow Roses instead of Red went round the heart wreath design, and lots of shades of green for the leaves. so done and dusted.
Next I cut it out, then traced round the back of it onto a piece of Centura Pearl card, and cut the aperture. The remaining card, I ran through the Happy Cut using the Spellbinders Parisian Accents die. Then I took the main piece and ran it through on top of the Fancy Flourish Grand Impressibilities die. I then layered the main sheet onto another sheet of Centura Pearl, using Foam Tape, and dropped the Water Coloured card through the aperture, so it was central. I threaded a yellow ribbon through the Accent die cuts, and placed one on either side of the card with some Pinflair Glue Gel.
Then to emphasize the Heart aperture I added some Cosmic Shimmer Gold Pearlised PVA in drops, and used the Happy Cut, and Spellbinders Spiral Blossom One die on some handmade papers, to create the yellow roses. I added a few green leaves, and some wired beads to the flower arrangement for a bit of pizzazz, as I didn't want to glitter any of it, due to the Mica, in the water colouring, and the Pearlescent sheen of the Centura Cardstock.
I added a pair of rings, from a Stamp, and embossed them, and mounted them on the front of the card, as a sentiment, so now we have a Wedding Card.
The inside is a sheet of Centura pearl insert paper, I imported the digi stamp into My Craft Studio, my graphics program of choice, and faded the digi into the background, then added a verse from, Free Verses 4 Cards here,
So there's my Wedding card, and DT entry for this month at Scrapbook Stamp Society Challenge Blog, do pop over and have a look at all the fabulous stamps they have and enter your self, as there are 5 prizes on offer, xxx
Have fun,
This is entered in the Following Challenges:
Love is in the air at Simply Create Too
Love and Romance Paper Creations Ink
Truly Madly Crafty Challenges anything goes
Desmet Designs, love (no red or pink)
Totally Paper Crafts Flower Challenge
Lou
So the Challenge for this month over at Scrapbook Stamp Society is "Hearts and Flowers." I found this wonderful Digi-stamp by Morgan Fitzsimons. A really Beautiful digi, of a Human and an Elf, being romantic.
A friend of mine said to me the other day, that if she ever got married, she wouldn't want a picture of some other married couple, who looks nothing like her, on a card, which is what sent me down this track for this image, instead of the usual Valentine's card.
This isnt a complicated card, as its just a case of layering up, much easier when you have a large A4 Die-cutting machine, mines a Happy Cut, and some fabulous Spellbinders dies and embossing sheets.
I used some Water Colour paper, through my printer, to print the digi out, and then went at it with some Whispers pens, Mica Inks, and a Water Brush. I didnt want too many colours, as I wanted this quite serene, and calm, so left the clothing as the white paper, and just added touches of colour to the clothes, which makes the couple stand out from the background, instead of being lost in a riot of colour.
Yellow Roses instead of Red went round the heart wreath design, and lots of shades of green for the leaves. so done and dusted.
Next I cut it out, then traced round the back of it onto a piece of Centura Pearl card, and cut the aperture. The remaining card, I ran through the Happy Cut using the Spellbinders Parisian Accents die. Then I took the main piece and ran it through on top of the Fancy Flourish Grand Impressibilities die. I then layered the main sheet onto another sheet of Centura Pearl, using Foam Tape, and dropped the Water Coloured card through the aperture, so it was central. I threaded a yellow ribbon through the Accent die cuts, and placed one on either side of the card with some Pinflair Glue Gel.
Then to emphasize the Heart aperture I added some Cosmic Shimmer Gold Pearlised PVA in drops, and used the Happy Cut, and Spellbinders Spiral Blossom One die on some handmade papers, to create the yellow roses. I added a few green leaves, and some wired beads to the flower arrangement for a bit of pizzazz, as I didn't want to glitter any of it, due to the Mica, in the water colouring, and the Pearlescent sheen of the Centura Cardstock.
I added a pair of rings, from a Stamp, and embossed them, and mounted them on the front of the card, as a sentiment, so now we have a Wedding Card.
The inside is a sheet of Centura pearl insert paper, I imported the digi stamp into My Craft Studio, my graphics program of choice, and faded the digi into the background, then added a verse from, Free Verses 4 Cards here,
So there's my Wedding card, and DT entry for this month at Scrapbook Stamp Society Challenge Blog, do pop over and have a look at all the fabulous stamps they have and enter your self, as there are 5 prizes on offer, xxx
Have fun,
This is entered in the Following Challenges:
Love is in the air at Simply Create Too
Love and Romance Paper Creations Ink
Truly Madly Crafty Challenges anything goes
Desmet Designs, love (no red or pink)
Totally Paper Crafts Flower Challenge
Lou
Tuesday, January 10, 2012
L8 card
Well I was posed a right doozey today.............make a number, a large one in height and decorate it. HUH?
What on earth am I going to do with that I thought!!
It had to be over 3" in height, and decorated!!!! You have to be kidding!!!
So, thinking cap on, not easy when you are doped to the max with painkillers, as Mr Bursitis has decided to pay a visit, so even moving the little finger is painful, but...............thought I did, long and hard, and eventually came up with text speak, you know when kids substitute letters in a text or email, as they are too lazy to write the words properly, L8 was conceived!!
and its all for Ditzy-Craftymess, ta guys!!
so here's my paltry offering...........
a 5 3/4 inch card base, 350 gsm,
Backing paper from an A5 sheet, The Finishing touch by My Craft Studio,
Purple Whisper Pen ink,
A Happy Birthday stamp,
Some flower stamps from I have no idea where
Some flowers made with tonic punches,
A few flowers from my stash,
Some mirri board, and a piece of ribbon
So first cover the card base with the backing paper, making sure that the notice board is central, and trim. As I dont have exactly the right shade of lilac/purple, I had to improvise, luckily I invested in some of the Whispers pens, just after the NEC show, and I had the right shade! Lots of colouring and huffing L8r I had the background stamped with Happy Birthday! , then onto creating the number 8.......Out came Mr Happy, and the Sizzix circle dies, as I am totally Pants at cutting circles! So hang the piece of card over the edge of the cutting plate, tape into position, and the do it again using a smaller circle to overlap, and create the figure 8, Then the smallest circle die, (artistically placed please note) and cut the holes in the figure 8. Ok now to cover it in flower stamps. These came from my huge wooden box of 50 stamp's I got from Amazon last year, but I have no idea whos stamps they are as it doesnt say!! So huff and puff and colour, and huff, and colur, oh and some puffing, as I was trying to catch my breath, more huffing and colouring, and more puffing, and finally it was covered with the Flowers design, phew!!
Ok but I needed more, so cut the L out of some holographic Mirri Board, to the same height as the 8, and sit and catch my breath and do some more thinking!! So Flowers was the predominating theme, ok so root out some of my graduated card stock, and start punching, now dont ask me which Tonic punches they are as I get very confused with them!! Janelle, and something I think, but I could be wrong! and start rolling and gluing the flowers together, then raid the stash for some professionally made flowers, to intersperse with my home made ones as I could be there all night, a bit of bling in the form of some "pearl" beads, stick it all down, add a bit of white holographic ribbon, to tie it all together and I am done, phew!!
What on earth am I going to do with that I thought!!
It had to be over 3" in height, and decorated!!!! You have to be kidding!!!
So, thinking cap on, not easy when you are doped to the max with painkillers, as Mr Bursitis has decided to pay a visit, so even moving the little finger is painful, but...............thought I did, long and hard, and eventually came up with text speak, you know when kids substitute letters in a text or email, as they are too lazy to write the words properly, L8 was conceived!!
and its all for Ditzy-Craftymess, ta guys!!
so here's my paltry offering...........
a 5 3/4 inch card base, 350 gsm,
Backing paper from an A5 sheet, The Finishing touch by My Craft Studio,
Purple Whisper Pen ink,
A Happy Birthday stamp,
Some flower stamps from I have no idea where
Some flowers made with tonic punches,
A few flowers from my stash,
Some mirri board, and a piece of ribbon
So first cover the card base with the backing paper, making sure that the notice board is central, and trim. As I dont have exactly the right shade of lilac/purple, I had to improvise, luckily I invested in some of the Whispers pens, just after the NEC show, and I had the right shade! Lots of colouring and huffing L8r I had the background stamped with Happy Birthday! , then onto creating the number 8.......Out came Mr Happy, and the Sizzix circle dies, as I am totally Pants at cutting circles! So hang the piece of card over the edge of the cutting plate, tape into position, and the do it again using a smaller circle to overlap, and create the figure 8, Then the smallest circle die, (artistically placed please note) and cut the holes in the figure 8. Ok now to cover it in flower stamps. These came from my huge wooden box of 50 stamp's I got from Amazon last year, but I have no idea whos stamps they are as it doesnt say!! So huff and puff and colour, and huff, and colur, oh and some puffing, as I was trying to catch my breath, more huffing and colouring, and more puffing, and finally it was covered with the Flowers design, phew!!
Ok but I needed more, so cut the L out of some holographic Mirri Board, to the same height as the 8, and sit and catch my breath and do some more thinking!! So Flowers was the predominating theme, ok so root out some of my graduated card stock, and start punching, now dont ask me which Tonic punches they are as I get very confused with them!! Janelle, and something I think, but I could be wrong! and start rolling and gluing the flowers together, then raid the stash for some professionally made flowers, to intersperse with my home made ones as I could be there all night, a bit of bling in the form of some "pearl" beads, stick it all down, add a bit of white holographic ribbon, to tie it all together and I am done, phew!!
Friday, January 06, 2012
Card from a freebie by Black Pumpkin
Well blog hopping as you do, and I came across this cat!! Seriously, she sat there in the middle of my screen staring at me!! So I took her out of the screen and put her onto a card!!
Every time I look at her I see a different expression, its really weird!!
So Downloaded her from Black Pumpkins site, here and at first thought, looks like the cats got the cream. Then looking in disgust at a plate of Rabbit food, and so on until, I came upon the Cheshire Cat in My Craft Studios A very Important Date. Now I do apologise, but the 2 of them seem made for each other, so I had to go for Valentiney type stuff, all the yewky things, like kissing, and day dreaming, and things no self respecting woman would do about any man, well ok, I do have a weakness for a certain Mr Connery, ok ok and a Mr Cruise, well ok then!!! Loads of them!!!
So into MCS she came, to be with her Paramour, so music, floaty dreamy stuff was called for. Luckily A Very Important Date is a very surreal type of disk, being based on Alice, and I swear that Caterpillar is so stoned he couldnt smoke straight, how did they get away with it back then?
So in the backing papers on Cd one I spotted this floaty background, loads of promise, no substance if you get where I am going with this, all dreamy and romantic, Ideal for the 2 love birds.....
then I thought well no actually I dont want him right there with her like that people could get the wrong impression you know, so off I trotted to the Artists Collection, again by MCS, as I knew that there was some "bubbles" in there, having done a frantic route round 3 of the CD's last night, (waiting for the all clear before I come clean, lol.)
So bubble in hand off I trot back to the 2 love birds, (why cant she see he's Mr Smarmy?), and pop him in to a bubble to stop him getting his wicked way with her!!
Then a sentiment, something suitably sloppy and yewky.............so off I trot, feeling a little happier this time, as I know there wont be any miniature Cheshire cats with Grey fur trotting around inside my screen by the time I get back, into More than Just words Vol 3. Hmmn nope not that one, not that one, scroll to the bottom of the page and finally I find one.
Out comes the old Mr Happy, and the Spellbinders Fancy Tags 2, and cut and emboss the sentiment, adding a touch of Purple ink through the die to take the edge off it. Add a few Ribbons from the stash, a couple of Butterflies, not that she's noticing them at all look at her, little hussy!! a bit of Crystal Accents, and mount it all up layered onto Lilac, and pink card...........Do you think I out to tell her not to hold her hopes on him?
No I havent been drinking, and no I havent taken the wrong tablets, but thats where my thought process went!!! Sorry thats the sort of mood I am in tonight!!
Every time I look at her I see a different expression, its really weird!!
So Downloaded her from Black Pumpkins site, here and at first thought, looks like the cats got the cream. Then looking in disgust at a plate of Rabbit food, and so on until, I came upon the Cheshire Cat in My Craft Studios A very Important Date. Now I do apologise, but the 2 of them seem made for each other, so I had to go for Valentiney type stuff, all the yewky things, like kissing, and day dreaming, and things no self respecting woman would do about any man, well ok, I do have a weakness for a certain Mr Connery, ok ok and a Mr Cruise, well ok then!!! Loads of them!!!
So into MCS she came, to be with her Paramour, so music, floaty dreamy stuff was called for. Luckily A Very Important Date is a very surreal type of disk, being based on Alice, and I swear that Caterpillar is so stoned he couldnt smoke straight, how did they get away with it back then?
So in the backing papers on Cd one I spotted this floaty background, loads of promise, no substance if you get where I am going with this, all dreamy and romantic, Ideal for the 2 love birds.....
then I thought well no actually I dont want him right there with her like that people could get the wrong impression you know, so off I trotted to the Artists Collection, again by MCS, as I knew that there was some "bubbles" in there, having done a frantic route round 3 of the CD's last night, (waiting for the all clear before I come clean, lol.)
So bubble in hand off I trot back to the 2 love birds, (why cant she see he's Mr Smarmy?), and pop him in to a bubble to stop him getting his wicked way with her!!
Then a sentiment, something suitably sloppy and yewky.............so off I trot, feeling a little happier this time, as I know there wont be any miniature Cheshire cats with Grey fur trotting around inside my screen by the time I get back, into More than Just words Vol 3. Hmmn nope not that one, not that one, scroll to the bottom of the page and finally I find one.
Out comes the old Mr Happy, and the Spellbinders Fancy Tags 2, and cut and emboss the sentiment, adding a touch of Purple ink through the die to take the edge off it. Add a few Ribbons from the stash, a couple of Butterflies, not that she's noticing them at all look at her, little hussy!! a bit of Crystal Accents, and mount it all up layered onto Lilac, and pink card...........Do you think I out to tell her not to hold her hopes on him?
No I havent been drinking, and no I havent taken the wrong tablets, but thats where my thought process went!!! Sorry thats the sort of mood I am in tonight!!
Thursday, January 05, 2012
Debbees free download.
Evening guys and girls,
well I was lucky enough to spot Debbees new Blog page, as it went live, and on her blog she has a challenge, you can find all the details Here.
So here is what I have created from the sheets debbees has kindly put up for us........
Basically I made a Gatefold pop up Easel card!
So I imported the jpegs into My Craft Studio, my Graphics program of choice, and they didnt distort, which was wonderful!! And decided which of the 4 sheets on offer I wanted to use...........That done, now to print them out, and start sticking together.
I had 2 main images, and some little people, and as I sat there looking at them it seemed to me that as one was holding a "Charge Card", that she was treating the other little person, which decided which image I was going to use.
So Images trimmed, it was time to start making the base card. (I would like to add that I would hate to post this one, as I have some wonderful Xerox card, which goes though my printer as easy as pie, so most of it is printed onto card, then mounted onto card, so the weight is a little on the heavy side!!)The images are slightly rectangular so the main image as mounted on a piece of card measuring 11 1/2"x 5 1/4", remember this is a gatefold, hence the length of the card, the second piece to form the easel measures 9 1/4" x 5 3/4".
I measured to the center of the largest piece to find the centre, using Hougie, then place the Topper on top, and measure to each side to find the score lines for the Gatefold, do leave yourself a little bit of room, just in case its slightly out, you can always trim it later. Next add the easel, I dont place YET another full piece of card behind and easel Gatefold, as it becomes quite cumbersome, though its also as sturdy as anything, so I only place enough to fix securely.
So now we have a gatefold card, with a flap that falls down when you open the gatefold. Next mount the image over the join of the card on the inside, so main image in place.
Then I wanted something a little bit different, so I cut small Rhombus shapes from some of Debbees paper, which, lucky for me, I had actually printed on paper, and made small Bunting with, which I threaded onto some invisible jewelry cord, and then added some lettered peel offs in Purple, to make the words "Happy Birthday", separated them into the 2 separate words, and leaving a bit of slack, fixed it across the gatefold, and then split the second main image in two, and mounted that over the ends of the cord.
Next came the pop up part, this is easy as its a tube of card, in a square or rectangle shape, fixed to the back of each figure, the lengths can vary as you want to make some perspective, but make sure that it doesnt stick over the edges of the "pop-up". Then glue it securely to the front of the main image, and the floor of the easel, so it is glued in 3 places. At this point I would suggest using a wet glue, one that bonds the surfaces properly, as you dont want the bits to fall off!! (I use the My Craft Studio Everyday glue, but thats my preference, as I havent found another wet glue that works as well as yet!!, You can get that here .)
On the back of the card, I placed 2 strips of the remaining papers, and then stamped and embossed the sentiment, onto some of the remaining Easel card, and then used my Happy Cut with the Spellbinders Classic Postage Stamp edger die, around all four sides, edged it with a Pine promarker, as its just not possible to get an ink pad in those little gaps, and mounted it over the join.
Right I am entering this in Debbees January Challenge, and if I spot anywhere else on my trawl around Blog world tonight, that suits, I'll maybe add a few more Challenges to the list!!
well I was lucky enough to spot Debbees new Blog page, as it went live, and on her blog she has a challenge, you can find all the details Here.
So here is what I have created from the sheets debbees has kindly put up for us........
Basically I made a Gatefold pop up Easel card!
So I imported the jpegs into My Craft Studio, my Graphics program of choice, and they didnt distort, which was wonderful!! And decided which of the 4 sheets on offer I wanted to use...........That done, now to print them out, and start sticking together.
I had 2 main images, and some little people, and as I sat there looking at them it seemed to me that as one was holding a "Charge Card", that she was treating the other little person, which decided which image I was going to use.
So Images trimmed, it was time to start making the base card. (I would like to add that I would hate to post this one, as I have some wonderful Xerox card, which goes though my printer as easy as pie, so most of it is printed onto card, then mounted onto card, so the weight is a little on the heavy side!!)The images are slightly rectangular so the main image as mounted on a piece of card measuring 11 1/2"x 5 1/4", remember this is a gatefold, hence the length of the card, the second piece to form the easel measures 9 1/4" x 5 3/4".
I measured to the center of the largest piece to find the centre, using Hougie, then place the Topper on top, and measure to each side to find the score lines for the Gatefold, do leave yourself a little bit of room, just in case its slightly out, you can always trim it later. Next add the easel, I dont place YET another full piece of card behind and easel Gatefold, as it becomes quite cumbersome, though its also as sturdy as anything, so I only place enough to fix securely.
So now we have a gatefold card, with a flap that falls down when you open the gatefold. Next mount the image over the join of the card on the inside, so main image in place.
Then I wanted something a little bit different, so I cut small Rhombus shapes from some of Debbees paper, which, lucky for me, I had actually printed on paper, and made small Bunting with, which I threaded onto some invisible jewelry cord, and then added some lettered peel offs in Purple, to make the words "Happy Birthday", separated them into the 2 separate words, and leaving a bit of slack, fixed it across the gatefold, and then split the second main image in two, and mounted that over the ends of the cord.
Next came the pop up part, this is easy as its a tube of card, in a square or rectangle shape, fixed to the back of each figure, the lengths can vary as you want to make some perspective, but make sure that it doesnt stick over the edges of the "pop-up". Then glue it securely to the front of the main image, and the floor of the easel, so it is glued in 3 places. At this point I would suggest using a wet glue, one that bonds the surfaces properly, as you dont want the bits to fall off!! (I use the My Craft Studio Everyday glue, but thats my preference, as I havent found another wet glue that works as well as yet!!, You can get that here .)
On the back of the card, I placed 2 strips of the remaining papers, and then stamped and embossed the sentiment, onto some of the remaining Easel card, and then used my Happy Cut with the Spellbinders Classic Postage Stamp edger die, around all four sides, edged it with a Pine promarker, as its just not possible to get an ink pad in those little gaps, and mounted it over the join.
Right I am entering this in Debbees January Challenge, and if I spot anywhere else on my trawl around Blog world tonight, that suits, I'll maybe add a few more Challenges to the list!!
Tuesday, December 27, 2011
Still at it!!
Oh well, at least I'll be finished by June this year!!
Yesterday I decided to use all this crop of Christmas papers, lying around in the craft room, making things for NEXT Christmas, so I can clear the way for some new Christmas stash later on in the year.
No I'm not mad, well I dont think so anyway, and as some of the papers in here are quite some age, its about time I used them, and replaced with new, see method to the madness! Which means I can justify buying new Christmas stock!!
So Todays offering is a Christmas Mini Hamper.........
Which brings me to the end of the Dovecrafts Pepper and Friends 12x12 papers! Yes! One down, loads more to go!!
Ok What I used:
A Kim Sutton B-C-E Hamper Template from here traced twice onto some Linen textured Cream Card, as I have loads of it, and it needs using. Some Red Satin 1.5 cm Ribbon, from the stash, some Hearts lace from the stash, Joanna Sheen and Giordano Love this Christmas Studio Stamps, Pepper and Friends Christmas party 12x12 papers, Promarkers, a red ink pad, and a Spellbinders Fancy Tags 2 die.
So cut the template out twice, and cut the bridge once, and a handle as long as you want, and as wide as the top of the bridge. So you end up with 4 pieces.
Assemble as per Kims instructions, ( I was lucky enough to sit and watch Kim do this at the Inspirations shop, (Hunkydory HQ for those who have never heard of it) back in September I believe, and for once, as there were only a few of us I was able to sit and absorb, so I didn't even read the instructions, but remembered how she did it and what she said.
Then I proceeded to cover it with the remaining sheets of 12x12, and bits from yesterdays assembly.
I stamped the Father Christmas from the Joanna Sheen Giordano Stamp with a black pigment ink pad, twice, and then coloured it with some promarkers: Red, Almond, Sunkissed pink, Primrose, Pine, and Cool Grey 4. I used a Decoroller in gold for the button and belt fastener, liberally applied My Craft Studio Ultra Fine Crystal Glitter with a Quickie Glue Pen, and allowed it to dry.
The Handle I then added 3 strips of Red DST to it, and affixed that Hearts lace on the outer 2 strips, and placed the red satin ribbon to cover the cut ends, and it was done. I used the same technique on the flaps for the hampers, again covering the cut end of lace with the ribbon, which was then folded over behind the flap.
I Stamped the greeting from the Joanna Sheen stamp in Rocket Red Brilliance pigment ink twice, and then used the Happy Cut and Spellbinders Fancy labels 2, die number 3 to cut them out,. A bit of DST saw the Basket/Hamper finished, ready to be put away for next Christmas.
I have entered this in the
Delicious Doodles Anything Goes Challenge
My Mums Craft Shop Challenge Anything Goes
Stampin' For The Weekend Anything Goes Challenge
Everybody Art Challenge Anything goes
Secret Crafter Saturday Challenge Anything goes
Charisma Cardz Challenges Anything Goes
Yesterday I decided to use all this crop of Christmas papers, lying around in the craft room, making things for NEXT Christmas, so I can clear the way for some new Christmas stash later on in the year.
No I'm not mad, well I dont think so anyway, and as some of the papers in here are quite some age, its about time I used them, and replaced with new, see method to the madness! Which means I can justify buying new Christmas stock!!
So Todays offering is a Christmas Mini Hamper.........
Which brings me to the end of the Dovecrafts Pepper and Friends 12x12 papers! Yes! One down, loads more to go!!
Ok What I used:
A Kim Sutton B-C-E Hamper Template from here traced twice onto some Linen textured Cream Card, as I have loads of it, and it needs using. Some Red Satin 1.5 cm Ribbon, from the stash, some Hearts lace from the stash, Joanna Sheen and Giordano Love this Christmas Studio Stamps, Pepper and Friends Christmas party 12x12 papers, Promarkers, a red ink pad, and a Spellbinders Fancy Tags 2 die.
So cut the template out twice, and cut the bridge once, and a handle as long as you want, and as wide as the top of the bridge. So you end up with 4 pieces.
Assemble as per Kims instructions, ( I was lucky enough to sit and watch Kim do this at the Inspirations shop, (Hunkydory HQ for those who have never heard of it) back in September I believe, and for once, as there were only a few of us I was able to sit and absorb, so I didn't even read the instructions, but remembered how she did it and what she said.
Then I proceeded to cover it with the remaining sheets of 12x12, and bits from yesterdays assembly.
I stamped the Father Christmas from the Joanna Sheen Giordano Stamp with a black pigment ink pad, twice, and then coloured it with some promarkers: Red, Almond, Sunkissed pink, Primrose, Pine, and Cool Grey 4. I used a Decoroller in gold for the button and belt fastener, liberally applied My Craft Studio Ultra Fine Crystal Glitter with a Quickie Glue Pen, and allowed it to dry.
The Handle I then added 3 strips of Red DST to it, and affixed that Hearts lace on the outer 2 strips, and placed the red satin ribbon to cover the cut ends, and it was done. I used the same technique on the flaps for the hampers, again covering the cut end of lace with the ribbon, which was then folded over behind the flap.
I Stamped the greeting from the Joanna Sheen stamp in Rocket Red Brilliance pigment ink twice, and then used the Happy Cut and Spellbinders Fancy labels 2, die number 3 to cut them out,. A bit of DST saw the Basket/Hamper finished, ready to be put away for next Christmas.
I have entered this in the
Delicious Doodles Anything Goes Challenge
My Mums Craft Shop Challenge Anything Goes
Stampin' For The Weekend Anything Goes Challenge
Everybody Art Challenge Anything goes
Secret Crafter Saturday Challenge Anything goes
Charisma Cardz Challenges Anything Goes
Friday, December 09, 2011
Cards for my crafty friends.
Well another post, these are all the same design, as I do believe that this is unique to me........
Paying attention? Then I'll begin.........
its a quadruple twisted easel card, measuring 8x8 inches. And I do believe no one else has come up with this, but its really easy to do, and I'll soon set up a new page for my own design creations on this blog, so keep your eyes open.........
This one was done using K&Co Glittered letters, Some Papermania Christmas Henbury Lane papers, Berry Merry Christmas 6x6 papers by Jennifer Ellory, and some paper from my stash, which is years old, but I think its again a papermania one.
I folded the Berry Merry papers using Mel Heatons paper Fold technique, inserted and glued the Papermania Henbury lane inside, and matted it onto some red textured card, followed by some holographic Mirri card which I bought quite a while ago at one of the Manchester Craft shows, this was way before it became popular and I got loads of packs of it for a pound.
The base was prepared using the old Papermania 12x12, and then scored at 4 inches, and again diagonally, to create the twisted easel. The bases were then stuck on with DST, and the glittered letters glued on and some peel offs added to edge the base. There are NO stoppers on this card at all. Its all to do with the way its assembled, so it then lies flat and slips into an ordinary 8x8 envelope for posting, with no extra charge for bulky letters!! Yet it is a dimensional card which displays pictures all the way around.
All these images and papers came from the My Craft Studio Christmas Classics Looking Out cd, I just used a bit of gold Holographic card to mount the images on. The images for the Toppers are printed on Pearlescent paper, and then Ultra fine Crystal Glitter was liberally applied.
This one is again all My Craft Studio, but this time the Walk in Winter Wonderland Cd. I printed the Fairy Baubles onto Acetate, and liberally coated the inky side with Crafters Companion Gold Spray and Sparkle to seal it, mounted the images to some white cardstock. Then on the outside of the acetate image I used a versa mark pen, and some gold Pearlescent embossing powder to edge the baubles, and some glittered Gold embossing Powder for the bauble tops.
Again MCS Winter Wishes Cd this time, printed on supersmooth Xerox 250gsm card, I got a full ream of this wonderful card for £7.99 from everycraftsapound.co.uk, a few weeks ago, and it is superb in both my inkjet and my laser printer. I actually printed the images twice, one slightly larger than the other, and then layered the smaller image on top of the larger one using DST . I also ran round the edge of each topper with a silver paint pen, to finish the edges off nicely. Then I used glitter, Crystal Accents, Fluffy Stuff, and also some mica powder in paint form to highlight various snowflakes throughout the images.
These images and paper were taken from makinghandmadecards.com, where I am a member, and this is from the Vintage Quick Christmas Cards download. I used Whispers Dual tip Markers and a water brush to colour the images, Highlighted small areas with Cosmic Shimmer Mica inks, and then used the Spellbinders Labels 22 with the Happy Cut to cut them out.
I then mounted them onto some C&C textured Gold Cardstock, and used Cosmic Shimmer, Olympic Gold Pearlescent Glue which dies dimensional, to create pearls of gold, and used Crystal Glitter to highlight areas. The the old corner chomper by We R Memory Keepers came out to play, and I used the 1/2 inch end.
This one used Crafters Companion Christmas Humphrey's Corner images and backing papers. I cut each image out using the lattice rectangles by Spellbinders, and matted them onto some Green patterned Mirri. each image has at least one area which was brightened with Cosmic Shimmer Mica inks, then Crystal Glitter, and MCS Snow was applied. The base was brightened up using the edges of some Holographic Peel offs, you know the straight bits down the sides, well "waste not, want not" as the old saying goes.
And last but not least..
Again Humphrey's Corner Christmas CD by Crafters Companion, some red printed cardstock, some holographic silver mirri card, and Cosmic Shimmer inks, and Crystal Glitter. These were cut using Sizzix circle dies, and the base was trimmed with some silver holographic peel offs and corners for interest.
Phew that took some time to write, as unbeknownst to you lot reading this, youngest had inserted himself into my crafting chair, and was making some Christmas cards..........." Mum....how do I ? Can you help.......Can you do this bit..........can you heat this? Can I borrow your mouse mat?
yep think you get the idea now lol. But here's one of his cards that he has just made..........
Not too bad for a nine year old, but I need to work on his stamping a bit I think!
Paying attention? Then I'll begin.........
its a quadruple twisted easel card, measuring 8x8 inches. And I do believe no one else has come up with this, but its really easy to do, and I'll soon set up a new page for my own design creations on this blog, so keep your eyes open.........
This one was done using K&Co Glittered letters, Some Papermania Christmas Henbury Lane papers, Berry Merry Christmas 6x6 papers by Jennifer Ellory, and some paper from my stash, which is years old, but I think its again a papermania one.
I folded the Berry Merry papers using Mel Heatons paper Fold technique, inserted and glued the Papermania Henbury lane inside, and matted it onto some red textured card, followed by some holographic Mirri card which I bought quite a while ago at one of the Manchester Craft shows, this was way before it became popular and I got loads of packs of it for a pound.
The base was prepared using the old Papermania 12x12, and then scored at 4 inches, and again diagonally, to create the twisted easel. The bases were then stuck on with DST, and the glittered letters glued on and some peel offs added to edge the base. There are NO stoppers on this card at all. Its all to do with the way its assembled, so it then lies flat and slips into an ordinary 8x8 envelope for posting, with no extra charge for bulky letters!! Yet it is a dimensional card which displays pictures all the way around.
All these images and papers came from the My Craft Studio Christmas Classics Looking Out cd, I just used a bit of gold Holographic card to mount the images on. The images for the Toppers are printed on Pearlescent paper, and then Ultra fine Crystal Glitter was liberally applied.
This one is again all My Craft Studio, but this time the Walk in Winter Wonderland Cd. I printed the Fairy Baubles onto Acetate, and liberally coated the inky side with Crafters Companion Gold Spray and Sparkle to seal it, mounted the images to some white cardstock. Then on the outside of the acetate image I used a versa mark pen, and some gold Pearlescent embossing powder to edge the baubles, and some glittered Gold embossing Powder for the bauble tops.
Again MCS Winter Wishes Cd this time, printed on supersmooth Xerox 250gsm card, I got a full ream of this wonderful card for £7.99 from everycraftsapound.co.uk, a few weeks ago, and it is superb in both my inkjet and my laser printer. I actually printed the images twice, one slightly larger than the other, and then layered the smaller image on top of the larger one using DST . I also ran round the edge of each topper with a silver paint pen, to finish the edges off nicely. Then I used glitter, Crystal Accents, Fluffy Stuff, and also some mica powder in paint form to highlight various snowflakes throughout the images.
These images and paper were taken from makinghandmadecards.com, where I am a member, and this is from the Vintage Quick Christmas Cards download. I used Whispers Dual tip Markers and a water brush to colour the images, Highlighted small areas with Cosmic Shimmer Mica inks, and then used the Spellbinders Labels 22 with the Happy Cut to cut them out.
I then mounted them onto some C&C textured Gold Cardstock, and used Cosmic Shimmer, Olympic Gold Pearlescent Glue which dies dimensional, to create pearls of gold, and used Crystal Glitter to highlight areas. The the old corner chomper by We R Memory Keepers came out to play, and I used the 1/2 inch end.
This one used Crafters Companion Christmas Humphrey's Corner images and backing papers. I cut each image out using the lattice rectangles by Spellbinders, and matted them onto some Green patterned Mirri. each image has at least one area which was brightened with Cosmic Shimmer Mica inks, then Crystal Glitter, and MCS Snow was applied. The base was brightened up using the edges of some Holographic Peel offs, you know the straight bits down the sides, well "waste not, want not" as the old saying goes.
And last but not least..
Phew that took some time to write, as unbeknownst to you lot reading this, youngest had inserted himself into my crafting chair, and was making some Christmas cards..........." Mum....how do I ? Can you help.......Can you do this bit..........can you heat this? Can I borrow your mouse mat?
yep think you get the idea now lol. But here's one of his cards that he has just made..........
Not too bad for a nine year old, but I need to work on his stamping a bit I think!
Subscribe to:
Posts (Atom)