The Animal Kingdom is the Challenge over at The Scrapbook Stamp Society Blog, this week, and I chose a stunning image by Mitzi Sato-Wiuff.
This is a Stunning Piece of work, and is a LARGE image in itself, as it is so detailed. I printed it out just slightly smaller than A4, so you can now Gauge the size of the card.
Promarkers AGAIN, to the rescue, and I took my time over it, I did it in sections, and it took about 3 days to finish, but worth the time I think.
I didn't want to have an ordinary background to the image, as there is in reality, little chance of this image coming to pass, so I removed the blank areas, and mounted the image onto some Oil effect card.
Next I needed a frame...........so the question was then how to achieve the effect I wanted. So I borrowed an Idea from Wendy at Create and Craft, and created a sort of dropped shelf inside the card.
So now I have something to use as a frame, I just had to decorate it! I got out my Happy Cut, well in all honesty, I didnt get it out as such, I just picked it up from under the table lol, it doesn't weigh much more than a Cuttlebug, (which is always good when you are in danger of dislocating your wrists!) and some Spell Binders flower dies and cut through 8 layers of tissue paper in one pass. I then decided to add leaves, so collected 2 shades of Yellow, and 3 shades of green, and ran those through as well. I layered it all up and added them to the Frame. I used yellow gems for the inside of the flowers, and a gold Gel pen for the inside of the flowers on the main picture.
I used some Ranger Colour coredinations cardstock, and cut a small sliver which I embossed with the Cuttlebug Organic Flourish folder, and sanded it back, and fixed it to the front base of the card.
I LOVE this image its an absolute delight! and I love the card it has created!
Why dont you pop over to the Shop and have a nosey. There is likely to be images that you recognise in there, as these ladies and gents are well established artists who have designed for years, even doing Book artwork, and Galleries. Let me know which are your favourites, xx
Card and paper crafting keeps me sane! But this is now mainly a Vlog, due to Eyesight issues. Please feel free to use my designs for inspiration Purposes, but do not Directly copy, or pass my work off as your own. I would rather inspire, than be "flattered" by copying, xx
Pages
If you like my blog please Follow, and I'll hop along and return the favour
Showing posts with label Spellbinders. Show all posts
Friday, March 16, 2012
Friday, March 02, 2012
SSS Design Team post
Well its getting to that time of the month when the new challenges are going live over at addicted-to-stamps and
Scrapbook Stamp Society, and have we got some challenges for you.......As well as some Changes.........
Blog Hop Candy!!!!
This works slightly differently to an ordinary Candy Give away, and there's the chance of some really yummy prizes. Firstly, they arent massive Hops. Each is kept quite small, so your not there forever. You have to go to Addicted to Stamps, follow the page, then join in the Hop, and say "Hi I am.... and Lou sent me". There are going to be some massive candy give aways on some of the hops, so join in the fun, to be in with a chance to win something yummy! Just remember to say who sent you!! Coz I get the chance at something yummy too!!
This week the theme is The Garden Patch, and this is my card for the week.........
Its from a Digi Stamp by Sue Miller, and is a wonderful Hippy Fairy dancing on a Flower. Isnt she cute?
I coloured the design with my Promarkers, adding some glitter to the birds and flower centre, and then trimmed the image to size. I wanted the body to stand out from the card, so I carefully ran a knife around the edge of the fairy, being careful not to cut her out completely, and added a bit of Blue mica around the edge of her body.
I was able to grab a few bargains at The Range, here in the UK, and got some packs of coredinations card stock, 80 sheets for £5.99, an absolute steal, so I rummaged through until I found one that matched the Blue Pearl Promarker, I had used.
I ran it through my Happy Cut with the Spellbinders Flowers Delight Impressabilities sheet, and sanded it back to reveal the core.
Then I used the Spell Binders Lattice Rectangles die to cut the sheet, extending it by leaving some of the card and die overhanging the base plate so it wouldn't cut, then matching the pattern and repeating the process.
I mounted the image and die cut onto some paper I had found in a water damaged book of William Morris designs, courtesy of my father, I have quite a few of these books, as he collected them at one stage, but some are water damaged so he gave them to me to use in my card making, Ta Dad, xx
I used the Blue Pearl Promarker to colour some White dotted ribbon, and the heads of 2 of the hat pins. I then fixed the ribbon to the back of the paper with some DST, and made a bow with the remnants. I cut the long shafts off the pins, and used Silicon Glue to fix the 3 pins, (One was left white,) and the bow. I also added a couple of butterflies to continue the Theme outside the main image, and draw the eye in to the picture.
Kids Always amaze me....just when I think I know something, they turn around and tell me something new.......firstly it was my eldest sons girl friend, telling me of her adoration of images by one of the Scrapbook Stamp Societies artists, this week it was my Daughter! We were driving along, and I was telling her all about the work I am doing for the Scrapbook Stamp Society, she was quite peeved with me as I had apparently neglected to say anything to her about it, oops, and I mentioned a Name of one of the Artists from SSS, she went potty at me!! It turns out that she has been following her work for quite some time, and adores the Fairy images by this artist, oops! She was introduced to the artists work by one of her teachers at secondary school.....about 8 yrs ago! I know that the artists have been around for quite awhile, but I didnt quite realise how well they are known, especially by the kids, sorry younger generations. Now you see I think of it like this if Boris came to SSS then I would be in Raptures, as I love Boris' work, and even have a huge Canvas of his work in my Hallway. But the kids are behaving exactly the same way as I would, in reaction to Names at SSS. I also know that there is some Hoohah going on, but I have done my research and my research is being re-enforced by the kids reactions, so if you are in doubt about it I would suggest researching the Names at SSS and find out for yourself who these people are..........You might be surprised.
While you are There why not have a look at the images, and tell me which is your favourite one?
So I am entering this card in the Following:
CCEE1209 Challenge http://cceestampers.blogspot.com/
http://cutecardthursday.blogspot.com/ Signs of Spring challenge
DYSU #61 THINGS WITH WINGS
http://www.dutchdare-cardchallenges.blogspot.com/ Tic Tac Toe, Flowers, Bling (pins) Distressing
http://just-hanna-stamps.blogspot.com/ Organic
Crafty Hugs all round,
xxx
Scrapbook Stamp Society, and have we got some challenges for you.......As well as some Changes.........
Blog Hop Candy!!!!
This works slightly differently to an ordinary Candy Give away, and there's the chance of some really yummy prizes. Firstly, they arent massive Hops. Each is kept quite small, so your not there forever. You have to go to Addicted to Stamps, follow the page, then join in the Hop, and say "Hi I am.... and Lou sent me". There are going to be some massive candy give aways on some of the hops, so join in the fun, to be in with a chance to win something yummy! Just remember to say who sent you!! Coz I get the chance at something yummy too!!
This week the theme is The Garden Patch, and this is my card for the week.........
Its from a Digi Stamp by Sue Miller, and is a wonderful Hippy Fairy dancing on a Flower. Isnt she cute?
I coloured the design with my Promarkers, adding some glitter to the birds and flower centre, and then trimmed the image to size. I wanted the body to stand out from the card, so I carefully ran a knife around the edge of the fairy, being careful not to cut her out completely, and added a bit of Blue mica around the edge of her body.
I was able to grab a few bargains at The Range, here in the UK, and got some packs of coredinations card stock, 80 sheets for £5.99, an absolute steal, so I rummaged through until I found one that matched the Blue Pearl Promarker, I had used.
I ran it through my Happy Cut with the Spellbinders Flowers Delight Impressabilities sheet, and sanded it back to reveal the core.
Then I used the Spell Binders Lattice Rectangles die to cut the sheet, extending it by leaving some of the card and die overhanging the base plate so it wouldn't cut, then matching the pattern and repeating the process.
I mounted the image and die cut onto some paper I had found in a water damaged book of William Morris designs, courtesy of my father, I have quite a few of these books, as he collected them at one stage, but some are water damaged so he gave them to me to use in my card making, Ta Dad, xx
I used the Blue Pearl Promarker to colour some White dotted ribbon, and the heads of 2 of the hat pins. I then fixed the ribbon to the back of the paper with some DST, and made a bow with the remnants. I cut the long shafts off the pins, and used Silicon Glue to fix the 3 pins, (One was left white,) and the bow. I also added a couple of butterflies to continue the Theme outside the main image, and draw the eye in to the picture.
Kids Always amaze me....just when I think I know something, they turn around and tell me something new.......firstly it was my eldest sons girl friend, telling me of her adoration of images by one of the Scrapbook Stamp Societies artists, this week it was my Daughter! We were driving along, and I was telling her all about the work I am doing for the Scrapbook Stamp Society, she was quite peeved with me as I had apparently neglected to say anything to her about it, oops, and I mentioned a Name of one of the Artists from SSS, she went potty at me!! It turns out that she has been following her work for quite some time, and adores the Fairy images by this artist, oops! She was introduced to the artists work by one of her teachers at secondary school.....about 8 yrs ago! I know that the artists have been around for quite awhile, but I didnt quite realise how well they are known, especially by the kids, sorry younger generations. Now you see I think of it like this if Boris came to SSS then I would be in Raptures, as I love Boris' work, and even have a huge Canvas of his work in my Hallway. But the kids are behaving exactly the same way as I would, in reaction to Names at SSS. I also know that there is some Hoohah going on, but I have done my research and my research is being re-enforced by the kids reactions, so if you are in doubt about it I would suggest researching the Names at SSS and find out for yourself who these people are..........You might be surprised.
While you are There why not have a look at the images, and tell me which is your favourite one?
CCEE1209 Challenge http://cceestampers.blogspot.com/
http://cutecardthursday.blogspot.com/ Signs of Spring challenge
DYSU #61 THINGS WITH WINGS
http://www.dutchdare-cardchallenges.blogspot.com/ Tic Tac Toe, Flowers, Bling (pins) Distressing
http://just-hanna-stamps.blogspot.com/ Organic
Crafty Hugs all round,
xxx
Thursday, February 02, 2012
Morgan Fitzsimons Kittens Valentines card
Well its that time of the week again, when it seems that all my DT work seems to get posted on the same day, I dont know, you hear nothingness from me for days then suddenly, whoosh! I am constantly popping up in your Blog list!! So this ones a DT card for Scrapbook Stamp Society.
So to the reason for this post..............
2 little cuties!!
I love this image, so versatile, and although this is supposed to be Valentines, I think it will do very nicely for the birth of Twins, or a wedding! Just change the colour scheme!
I started with the main digi stamp which you can get Here.
I imported it into one of my graphics programs, and copied the design, and removed the inside of the heart, then I copied the copy! So I had 2 frames and one full image.
I printed them off onto a sheet of A4 supersmooth paper, and attacked them with my heat gun, to cure the ink, as I was going to use promarkers with them. Its important when using an Alcohol base pen to make sure that the ink is completely dry from an ink based printer, as the alcohol can smudge the lines if your not careful, so leave it for 24 hrs before using, or cheat like I do, and heat it with the heat gun!
So I set to with the colouring. The frame on the main image just had the 2 colours that I was going to use on the top 2 layers, no colouring on the frame for that one, as I was only going to cover it up!, and then I started to work on the main image and those cute little Kittens. I ummed and Ahh'ed over wether to make one a Tricolour, ginger Tom, Ginger and white, and in the end settled for a ginger and white, bot, and a tabby girl, as you can just see the bow peeking out from under her chin. Some of the colouring is very fine, and I have some lovely ultra fine nibs for my Promarkers which make life an awful lot easier!
I added some glittered glue to the flowers on the main image, added a yellow background to them, and a green cushion for them to sleep on.
Next up was to deal with the 2 Heart frames, the first one I trimmed inside the original lines,so that it is narrower than the base image frame, to provide more depth and dimension, and and used 3 shades of green to wipe around the frame with.
Then I turned my attention to the final layer for the frame. I carefully coloured the flowers and leaves in, and proceeded to cut the floral centre from the rest of the frame. Once that was done, I used a clear embossing padf all over it, and applied some clear embossing powder, which was heated with a heat gun, until it melted and turned opaque like a varnish. I left it to cool and did the same again. for the last coat I used a clear Holographic embossing powder so it glimmers when it catches the light.
I then carefully layered the frame up, using small sticky pads for the first layer, and a clear silicon glue for the last, as it is too narrow to use sticky pads with.
Now to the card base....... I have a Happy Cut by Artemio, an alternative to the Grand Calibur, by Spellbinders. It is an A4 Die cutter, which comes with all the necessary plates, , and seems to be a white version of the Joy Trouvaille, but better made. So I took a 5x5" square Card base, and used a Pronty A4 embossing sheet, Flowers, on it with the Happy Cut. I do have several large embossing sheets, and the Pronty ones are new to me, they only arrived yesterday, but they work a treat!!
So I had a card base embossed with the floral design, next step was to stencil some Tim Holtz distress stain, Fired Brick, through the design, then fold the card over and create the twisted easel, line the embossing sheet up on the debossed side and repeat.
I used the Spellbinders Spiral Blossom 2 die on some, plastic backed fabric, and created a flower by rolling the strip round and round, then letting it relax a bit before gluing the spiral to the base, which was then glued onto the base of the card as a stopper.
I used a Leane Creatief Lea-abilities 001 die on some green card stock, and cut the leaves from the frame, and drew some veins on them with an Ultra fine nibbed promarker, and inserted them underneath the flower, and across the card. A touch of Glittered glue on the flower, and its as you see it. Finished.
Told you this was a wordy post those of you who have made it here from Scrapbook Stamp Society, hope you like what I did, and that you will pop to the shop, and grab the kittens for yourself,
I am entering this in the following Challenges:
Anything goes : To the one I love
Divas by design Anything goes
Happy Daze a Technique you love to use
Moving along with the times Have a Heart
Lou
xxx
So to the reason for this post..............
2 little cuties!!
I love this image, so versatile, and although this is supposed to be Valentines, I think it will do very nicely for the birth of Twins, or a wedding! Just change the colour scheme!
I started with the main digi stamp which you can get Here.
I imported it into one of my graphics programs, and copied the design, and removed the inside of the heart, then I copied the copy! So I had 2 frames and one full image.
I printed them off onto a sheet of A4 supersmooth paper, and attacked them with my heat gun, to cure the ink, as I was going to use promarkers with them. Its important when using an Alcohol base pen to make sure that the ink is completely dry from an ink based printer, as the alcohol can smudge the lines if your not careful, so leave it for 24 hrs before using, or cheat like I do, and heat it with the heat gun!
So I set to with the colouring. The frame on the main image just had the 2 colours that I was going to use on the top 2 layers, no colouring on the frame for that one, as I was only going to cover it up!, and then I started to work on the main image and those cute little Kittens. I ummed and Ahh'ed over wether to make one a Tricolour, ginger Tom, Ginger and white, and in the end settled for a ginger and white, bot, and a tabby girl, as you can just see the bow peeking out from under her chin. Some of the colouring is very fine, and I have some lovely ultra fine nibs for my Promarkers which make life an awful lot easier!
I added some glittered glue to the flowers on the main image, added a yellow background to them, and a green cushion for them to sleep on.
Next up was to deal with the 2 Heart frames, the first one I trimmed inside the original lines,so that it is narrower than the base image frame, to provide more depth and dimension, and and used 3 shades of green to wipe around the frame with.
Then I turned my attention to the final layer for the frame. I carefully coloured the flowers and leaves in, and proceeded to cut the floral centre from the rest of the frame. Once that was done, I used a clear embossing padf all over it, and applied some clear embossing powder, which was heated with a heat gun, until it melted and turned opaque like a varnish. I left it to cool and did the same again. for the last coat I used a clear Holographic embossing powder so it glimmers when it catches the light.
I then carefully layered the frame up, using small sticky pads for the first layer, and a clear silicon glue for the last, as it is too narrow to use sticky pads with.
Now to the card base....... I have a Happy Cut by Artemio, an alternative to the Grand Calibur, by Spellbinders. It is an A4 Die cutter, which comes with all the necessary plates, , and seems to be a white version of the Joy Trouvaille, but better made. So I took a 5x5" square Card base, and used a Pronty A4 embossing sheet, Flowers, on it with the Happy Cut. I do have several large embossing sheets, and the Pronty ones are new to me, they only arrived yesterday, but they work a treat!!
So I had a card base embossed with the floral design, next step was to stencil some Tim Holtz distress stain, Fired Brick, through the design, then fold the card over and create the twisted easel, line the embossing sheet up on the debossed side and repeat.
I used the Spellbinders Spiral Blossom 2 die on some, plastic backed fabric, and created a flower by rolling the strip round and round, then letting it relax a bit before gluing the spiral to the base, which was then glued onto the base of the card as a stopper.
I used a Leane Creatief Lea-abilities 001 die on some green card stock, and cut the leaves from the frame, and drew some veins on them with an Ultra fine nibbed promarker, and inserted them underneath the flower, and across the card. A touch of Glittered glue on the flower, and its as you see it. Finished.
Told you this was a wordy post those of you who have made it here from Scrapbook Stamp Society, hope you like what I did, and that you will pop to the shop, and grab the kittens for yourself,
I am entering this in the following Challenges:
Anything goes : To the one I love
Divas by design Anything goes
Happy Daze a Technique you love to use
Moving along with the times Have a Heart
Lou
xxx
Tuesday, January 24, 2012
Wedding Card DT project
Well its getting to the time of year when those who are lucky enough to have romance in their lives (No Darling, playing Heavy Metal music to me doesn't really make the grade!), are starting to think about Flowers, Choccies, and all the nice things.
So the Challenge for this month over at Scrapbook Stamp Society is "Hearts and Flowers." I found this wonderful Digi-stamp by Morgan Fitzsimons. A really Beautiful digi, of a Human and an Elf, being romantic.
A friend of mine said to me the other day, that if she ever got married, she wouldn't want a picture of some other married couple, who looks nothing like her, on a card, which is what sent me down this track for this image, instead of the usual Valentine's card.
This isnt a complicated card, as its just a case of layering up, much easier when you have a large A4 Die-cutting machine, mines a Happy Cut, and some fabulous Spellbinders dies and embossing sheets.
I used some Water Colour paper, through my printer, to print the digi out, and then went at it with some Whispers pens, Mica Inks, and a Water Brush. I didnt want too many colours, as I wanted this quite serene, and calm, so left the clothing as the white paper, and just added touches of colour to the clothes, which makes the couple stand out from the background, instead of being lost in a riot of colour.
Yellow Roses instead of Red went round the heart wreath design, and lots of shades of green for the leaves. so done and dusted.
Next I cut it out, then traced round the back of it onto a piece of Centura Pearl card, and cut the aperture. The remaining card, I ran through the Happy Cut using the Spellbinders Parisian Accents die. Then I took the main piece and ran it through on top of the Fancy Flourish Grand Impressibilities die. I then layered the main sheet onto another sheet of Centura Pearl, using Foam Tape, and dropped the Water Coloured card through the aperture, so it was central. I threaded a yellow ribbon through the Accent die cuts, and placed one on either side of the card with some Pinflair Glue Gel.
Then to emphasize the Heart aperture I added some Cosmic Shimmer Gold Pearlised PVA in drops, and used the Happy Cut, and Spellbinders Spiral Blossom One die on some handmade papers, to create the yellow roses. I added a few green leaves, and some wired beads to the flower arrangement for a bit of pizzazz, as I didn't want to glitter any of it, due to the Mica, in the water colouring, and the Pearlescent sheen of the Centura Cardstock.
I added a pair of rings, from a Stamp, and embossed them, and mounted them on the front of the card, as a sentiment, so now we have a Wedding Card.
The inside is a sheet of Centura pearl insert paper, I imported the digi stamp into My Craft Studio, my graphics program of choice, and faded the digi into the background, then added a verse from, Free Verses 4 Cards here,
So there's my Wedding card, and DT entry for this month at Scrapbook Stamp Society Challenge Blog, do pop over and have a look at all the fabulous stamps they have and enter your self, as there are 5 prizes on offer, xxx
Have fun,
This is entered in the Following Challenges:
Love is in the air at Simply Create Too
Love and Romance Paper Creations Ink
Truly Madly Crafty Challenges anything goes
Desmet Designs, love (no red or pink)
Totally Paper Crafts Flower Challenge
Lou
So the Challenge for this month over at Scrapbook Stamp Society is "Hearts and Flowers." I found this wonderful Digi-stamp by Morgan Fitzsimons. A really Beautiful digi, of a Human and an Elf, being romantic.
A friend of mine said to me the other day, that if she ever got married, she wouldn't want a picture of some other married couple, who looks nothing like her, on a card, which is what sent me down this track for this image, instead of the usual Valentine's card.
This isnt a complicated card, as its just a case of layering up, much easier when you have a large A4 Die-cutting machine, mines a Happy Cut, and some fabulous Spellbinders dies and embossing sheets.
I used some Water Colour paper, through my printer, to print the digi out, and then went at it with some Whispers pens, Mica Inks, and a Water Brush. I didnt want too many colours, as I wanted this quite serene, and calm, so left the clothing as the white paper, and just added touches of colour to the clothes, which makes the couple stand out from the background, instead of being lost in a riot of colour.
Yellow Roses instead of Red went round the heart wreath design, and lots of shades of green for the leaves. so done and dusted.
Next I cut it out, then traced round the back of it onto a piece of Centura Pearl card, and cut the aperture. The remaining card, I ran through the Happy Cut using the Spellbinders Parisian Accents die. Then I took the main piece and ran it through on top of the Fancy Flourish Grand Impressibilities die. I then layered the main sheet onto another sheet of Centura Pearl, using Foam Tape, and dropped the Water Coloured card through the aperture, so it was central. I threaded a yellow ribbon through the Accent die cuts, and placed one on either side of the card with some Pinflair Glue Gel.
Then to emphasize the Heart aperture I added some Cosmic Shimmer Gold Pearlised PVA in drops, and used the Happy Cut, and Spellbinders Spiral Blossom One die on some handmade papers, to create the yellow roses. I added a few green leaves, and some wired beads to the flower arrangement for a bit of pizzazz, as I didn't want to glitter any of it, due to the Mica, in the water colouring, and the Pearlescent sheen of the Centura Cardstock.
I added a pair of rings, from a Stamp, and embossed them, and mounted them on the front of the card, as a sentiment, so now we have a Wedding Card.
The inside is a sheet of Centura pearl insert paper, I imported the digi stamp into My Craft Studio, my graphics program of choice, and faded the digi into the background, then added a verse from, Free Verses 4 Cards here,
So there's my Wedding card, and DT entry for this month at Scrapbook Stamp Society Challenge Blog, do pop over and have a look at all the fabulous stamps they have and enter your self, as there are 5 prizes on offer, xxx
Have fun,
This is entered in the Following Challenges:
Love is in the air at Simply Create Too
Love and Romance Paper Creations Ink
Truly Madly Crafty Challenges anything goes
Desmet Designs, love (no red or pink)
Totally Paper Crafts Flower Challenge
Lou
Monday, January 23, 2012
1st Post for BPMS Design Team
Well as you may be aware I went applying for design Teams a few weeks ago, and this is my first post for Black Pumpkin's Messy Studio.
I was given a choice of images, and I chose this one to make my first card with.
It took a while to do, as I loved the Zentangle on it, and decided to blow it up in My Craft Studio to A4 size, print it out and then colour it.
When printing off a digi image there's 2 ways to get the ink to cure off, that I am aware of: Walk away and leave it, (Not generally an option for me as I am an Impatient crafter!), or dry it with a heat gun (Generally what I do!).
This time though I did leave it overnight, as I knew once I started I wouldnt be able to stop, and it was gone 10pm!!
So the next day I started colouring in.............did lunch, coloured in..........., did dinner, coloured in............, think you get the idea!!
Eventually I had finished, so now the next question was what to do with it? This happens to me a lot, as I dont tend to go at a project with a plan in mind, but just go with the flow, and adapt on the way! So I had a large coloured flower on a sheet of A4.........do I colour a background , do I create a background, do I cut it out, do I alter it? All these things went through my mind, and ideas came and went.
So I cut it out, as I had an idea of what I wanted to do with it.....
A friend of mine from a forum, has been very Poorly, and only managed to get in touch with us old worry warts, via an email to the Studio at C&C and Martyn Parker. As soon as us old worry warts heard the news we were all over the forum, trying to find out what had gone on, and beat the poor lady to the posts. She has been very ill, but thankfully is now recovering from some very major surgery, and the look on this flowers face just makes me think of how she must be feeling at the present moment, so it had to be a get well card!
I popped into my craft studio for some backgrounds, and the ever versatile and popular A very Important Date (Set around Alice in Wonderland), was my first choice. I chose one of the backing papers, with a quote from Lewis Carol "If I had a world of my own, everything would be nonsense."
It matched the colours I had chosen for the flower, and the wording was apt, so I stuck it to some heavy weight card stock, A3 size, then stuck the flower to the front, and cut it out, creating a shaped card.
I added the Caterpillar and Mad Hatter Characters, and went hunting for verses to cheer her up. I found a couple of suitable ones on Verses 4 cards, and printed one off as an insert, about the joys of..............okay okay, yes it was Chocolate!
And another about cards making you feel better.
Then a few drops, well okay a lot of drops of Anita's 3D glaze, and let it dry, while I used my edgebilities Bracket die, to cut the front greeting, and rolled the edges over with a toothpick, to create a scroll effect, then placed it on the hands of the caterpillar and the Mad Hatter.
Hopefully this will bring a smile to her face, and we all wish her a speedy recovery, and quick return to crafting
xx
Lou
I was given a choice of images, and I chose this one to make my first card with.
It took a while to do, as I loved the Zentangle on it, and decided to blow it up in My Craft Studio to A4 size, print it out and then colour it.
When printing off a digi image there's 2 ways to get the ink to cure off, that I am aware of: Walk away and leave it, (Not generally an option for me as I am an Impatient crafter!), or dry it with a heat gun (Generally what I do!).
This time though I did leave it overnight, as I knew once I started I wouldnt be able to stop, and it was gone 10pm!!
So the next day I started colouring in.............did lunch, coloured in..........., did dinner, coloured in............, think you get the idea!!
Eventually I had finished, so now the next question was what to do with it? This happens to me a lot, as I dont tend to go at a project with a plan in mind, but just go with the flow, and adapt on the way! So I had a large coloured flower on a sheet of A4.........do I colour a background , do I create a background, do I cut it out, do I alter it? All these things went through my mind, and ideas came and went.
So I cut it out, as I had an idea of what I wanted to do with it.....
A friend of mine from a forum, has been very Poorly, and only managed to get in touch with us old worry warts, via an email to the Studio at C&C and Martyn Parker. As soon as us old worry warts heard the news we were all over the forum, trying to find out what had gone on, and beat the poor lady to the posts. She has been very ill, but thankfully is now recovering from some very major surgery, and the look on this flowers face just makes me think of how she must be feeling at the present moment, so it had to be a get well card!
I popped into my craft studio for some backgrounds, and the ever versatile and popular A very Important Date (Set around Alice in Wonderland), was my first choice. I chose one of the backing papers, with a quote from Lewis Carol "If I had a world of my own, everything would be nonsense."
It matched the colours I had chosen for the flower, and the wording was apt, so I stuck it to some heavy weight card stock, A3 size, then stuck the flower to the front, and cut it out, creating a shaped card.
I added the Caterpillar and Mad Hatter Characters, and went hunting for verses to cheer her up. I found a couple of suitable ones on Verses 4 cards, and printed one off as an insert, about the joys of..............okay okay, yes it was Chocolate!
And another about cards making you feel better.
Then a few drops, well okay a lot of drops of Anita's 3D glaze, and let it dry, while I used my edgebilities Bracket die, to cut the front greeting, and rolled the edges over with a toothpick, to create a scroll effect, then placed it on the hands of the caterpillar and the Mad Hatter.
Hopefully this will bring a smile to her face, and we all wish her a speedy recovery, and quick return to crafting
xx
Lou
Sunday, January 08, 2012
Need help Please!!!
Evening guys and girls,
well I have a list of sites I have visited to pop back to, a written list of sites that have the odd freebie image to use in the course of my card making, and generally with a challenge as well, but unfortunately, "The Tank" our 10mth old Rottie has run off with it and eaten it!!!
The little bleeder is allowed in here, and generally nicks scraps off the floor, for chewing on, there has to be something in the card that satisfies a craving for him, as he just WONT stop, and has previously eaten the odd project!! We have now got to the point where Hubby is going to build me a gate for the craft room, as I dont like having the door shut, as the room is too small as it is!
So he has run off with the list and eaten it, and now I dont know where the central image for this card came from.........If any one knows, I would appreciate knowing so I can give due credit!!
Ok, so Composition, well, for me the creative process can be prodded into life with a variety of things, It could be a Backing paper, embellishment, verse, ribbon, or Topper, and as I managed to snaffle this freebie, that was the starting place for this card for me.
It started as a black and white image, which I printed onto some supersmooth paper, and proceeded to colour with Promarkers, but the poor Mum looks totally fed up, so I was guessing that she wanted to sleep while the Pups wanted to play, so I ended up along the lines of a Summers night at the North Pole, with the Aurora Borealis starting to make an appearance, probably completely wrong, but call it artistic licence!!
Next step was to find a suitably icy picture/Background, so though my huge collection of CD's to find the elements on a My Craft Studio Disk, they are the side panels and lid of the set 3 Walk in Winter Wonderland disk, that came as a freebie with a magazine last year, even though I do have the other 2 disks, the freebie disks dont always have the same imagery on them!
But they were suitably Icy, and the blue fit in well with where I was going with it.
So Base card cut to 15x17.5 cm, yes I do swap and change between metric and imperial, layered on the base sheet, the lid of the box, then add a bit of dimension with foam pads to add the 2 darkest side panels on top of it.
then mount poor old Mum and pups with some pads, use the Parisienne Mottif corner die by Spell binders, on some silver Holographic card, and tuck the ends under the main image, add a strip of the base navy blue card, and stick some Glittered Dovecrafts Pepper and friends Ribbon along the middle, a Kanban envelope sticker, was then stuck to some card and punched out, then mounted to the Ribbon, I found a large Snowflake lying on my desk, that had been punched on Silver Mirri paper, and added that to the top. Out came the Quickie glue pen, and a bit of Ultrafine glitter, and hey presto, job done,
But I would like to know where the image came from, pretty please xxx
This is being entered in the following Challenges:
Let it Snow
Use embellisments
Layers, Layers and more Layers
Anything Goes
inkyimpressionschallenges Anything Goes
well I have a list of sites I have visited to pop back to, a written list of sites that have the odd freebie image to use in the course of my card making, and generally with a challenge as well, but unfortunately, "The Tank" our 10mth old Rottie has run off with it and eaten it!!!
The little bleeder is allowed in here, and generally nicks scraps off the floor, for chewing on, there has to be something in the card that satisfies a craving for him, as he just WONT stop, and has previously eaten the odd project!! We have now got to the point where Hubby is going to build me a gate for the craft room, as I dont like having the door shut, as the room is too small as it is!
So he has run off with the list and eaten it, and now I dont know where the central image for this card came from.........If any one knows, I would appreciate knowing so I can give due credit!!
Ok, so Composition, well, for me the creative process can be prodded into life with a variety of things, It could be a Backing paper, embellishment, verse, ribbon, or Topper, and as I managed to snaffle this freebie, that was the starting place for this card for me.
It started as a black and white image, which I printed onto some supersmooth paper, and proceeded to colour with Promarkers, but the poor Mum looks totally fed up, so I was guessing that she wanted to sleep while the Pups wanted to play, so I ended up along the lines of a Summers night at the North Pole, with the Aurora Borealis starting to make an appearance, probably completely wrong, but call it artistic licence!!
Next step was to find a suitably icy picture/Background, so though my huge collection of CD's to find the elements on a My Craft Studio Disk, they are the side panels and lid of the set 3 Walk in Winter Wonderland disk, that came as a freebie with a magazine last year, even though I do have the other 2 disks, the freebie disks dont always have the same imagery on them!
But they were suitably Icy, and the blue fit in well with where I was going with it.
So Base card cut to 15x17.5 cm, yes I do swap and change between metric and imperial, layered on the base sheet, the lid of the box, then add a bit of dimension with foam pads to add the 2 darkest side panels on top of it.
then mount poor old Mum and pups with some pads, use the Parisienne Mottif corner die by Spell binders, on some silver Holographic card, and tuck the ends under the main image, add a strip of the base navy blue card, and stick some Glittered Dovecrafts Pepper and friends Ribbon along the middle, a Kanban envelope sticker, was then stuck to some card and punched out, then mounted to the Ribbon, I found a large Snowflake lying on my desk, that had been punched on Silver Mirri paper, and added that to the top. Out came the Quickie glue pen, and a bit of Ultrafine glitter, and hey presto, job done,
But I would like to know where the image came from, pretty please xxx
This is being entered in the following Challenges:
Let it Snow
Use embellisments
Layers, Layers and more Layers
Anything Goes
inkyimpressionschallenges Anything Goes
Friday, January 06, 2012
Card from a freebie by Black Pumpkin
Well blog hopping as you do, and I came across this cat!! Seriously, she sat there in the middle of my screen staring at me!! So I took her out of the screen and put her onto a card!!
Every time I look at her I see a different expression, its really weird!!
So Downloaded her from Black Pumpkins site, here and at first thought, looks like the cats got the cream. Then looking in disgust at a plate of Rabbit food, and so on until, I came upon the Cheshire Cat in My Craft Studios A very Important Date. Now I do apologise, but the 2 of them seem made for each other, so I had to go for Valentiney type stuff, all the yewky things, like kissing, and day dreaming, and things no self respecting woman would do about any man, well ok, I do have a weakness for a certain Mr Connery, ok ok and a Mr Cruise, well ok then!!! Loads of them!!!
So into MCS she came, to be with her Paramour, so music, floaty dreamy stuff was called for. Luckily A Very Important Date is a very surreal type of disk, being based on Alice, and I swear that Caterpillar is so stoned he couldnt smoke straight, how did they get away with it back then?
So in the backing papers on Cd one I spotted this floaty background, loads of promise, no substance if you get where I am going with this, all dreamy and romantic, Ideal for the 2 love birds.....
then I thought well no actually I dont want him right there with her like that people could get the wrong impression you know, so off I trotted to the Artists Collection, again by MCS, as I knew that there was some "bubbles" in there, having done a frantic route round 3 of the CD's last night, (waiting for the all clear before I come clean, lol.)
So bubble in hand off I trot back to the 2 love birds, (why cant she see he's Mr Smarmy?), and pop him in to a bubble to stop him getting his wicked way with her!!
Then a sentiment, something suitably sloppy and yewky.............so off I trot, feeling a little happier this time, as I know there wont be any miniature Cheshire cats with Grey fur trotting around inside my screen by the time I get back, into More than Just words Vol 3. Hmmn nope not that one, not that one, scroll to the bottom of the page and finally I find one.
Out comes the old Mr Happy, and the Spellbinders Fancy Tags 2, and cut and emboss the sentiment, adding a touch of Purple ink through the die to take the edge off it. Add a few Ribbons from the stash, a couple of Butterflies, not that she's noticing them at all look at her, little hussy!! a bit of Crystal Accents, and mount it all up layered onto Lilac, and pink card...........Do you think I out to tell her not to hold her hopes on him?
No I havent been drinking, and no I havent taken the wrong tablets, but thats where my thought process went!!! Sorry thats the sort of mood I am in tonight!!
Every time I look at her I see a different expression, its really weird!!
So Downloaded her from Black Pumpkins site, here and at first thought, looks like the cats got the cream. Then looking in disgust at a plate of Rabbit food, and so on until, I came upon the Cheshire Cat in My Craft Studios A very Important Date. Now I do apologise, but the 2 of them seem made for each other, so I had to go for Valentiney type stuff, all the yewky things, like kissing, and day dreaming, and things no self respecting woman would do about any man, well ok, I do have a weakness for a certain Mr Connery, ok ok and a Mr Cruise, well ok then!!! Loads of them!!!
So into MCS she came, to be with her Paramour, so music, floaty dreamy stuff was called for. Luckily A Very Important Date is a very surreal type of disk, being based on Alice, and I swear that Caterpillar is so stoned he couldnt smoke straight, how did they get away with it back then?
So in the backing papers on Cd one I spotted this floaty background, loads of promise, no substance if you get where I am going with this, all dreamy and romantic, Ideal for the 2 love birds.....
then I thought well no actually I dont want him right there with her like that people could get the wrong impression you know, so off I trotted to the Artists Collection, again by MCS, as I knew that there was some "bubbles" in there, having done a frantic route round 3 of the CD's last night, (waiting for the all clear before I come clean, lol.)
So bubble in hand off I trot back to the 2 love birds, (why cant she see he's Mr Smarmy?), and pop him in to a bubble to stop him getting his wicked way with her!!
Then a sentiment, something suitably sloppy and yewky.............so off I trot, feeling a little happier this time, as I know there wont be any miniature Cheshire cats with Grey fur trotting around inside my screen by the time I get back, into More than Just words Vol 3. Hmmn nope not that one, not that one, scroll to the bottom of the page and finally I find one.
Out comes the old Mr Happy, and the Spellbinders Fancy Tags 2, and cut and emboss the sentiment, adding a touch of Purple ink through the die to take the edge off it. Add a few Ribbons from the stash, a couple of Butterflies, not that she's noticing them at all look at her, little hussy!! a bit of Crystal Accents, and mount it all up layered onto Lilac, and pink card...........Do you think I out to tell her not to hold her hopes on him?
No I havent been drinking, and no I havent taken the wrong tablets, but thats where my thought process went!!! Sorry thats the sort of mood I am in tonight!!
Thursday, January 05, 2012
Debbees free download.
Evening guys and girls,
well I was lucky enough to spot Debbees new Blog page, as it went live, and on her blog she has a challenge, you can find all the details Here.
So here is what I have created from the sheets debbees has kindly put up for us........
Basically I made a Gatefold pop up Easel card!
So I imported the jpegs into My Craft Studio, my Graphics program of choice, and they didnt distort, which was wonderful!! And decided which of the 4 sheets on offer I wanted to use...........That done, now to print them out, and start sticking together.
I had 2 main images, and some little people, and as I sat there looking at them it seemed to me that as one was holding a "Charge Card", that she was treating the other little person, which decided which image I was going to use.
So Images trimmed, it was time to start making the base card. (I would like to add that I would hate to post this one, as I have some wonderful Xerox card, which goes though my printer as easy as pie, so most of it is printed onto card, then mounted onto card, so the weight is a little on the heavy side!!)The images are slightly rectangular so the main image as mounted on a piece of card measuring 11 1/2"x 5 1/4", remember this is a gatefold, hence the length of the card, the second piece to form the easel measures 9 1/4" x 5 3/4".
I measured to the center of the largest piece to find the centre, using Hougie, then place the Topper on top, and measure to each side to find the score lines for the Gatefold, do leave yourself a little bit of room, just in case its slightly out, you can always trim it later. Next add the easel, I dont place YET another full piece of card behind and easel Gatefold, as it becomes quite cumbersome, though its also as sturdy as anything, so I only place enough to fix securely.
So now we have a gatefold card, with a flap that falls down when you open the gatefold. Next mount the image over the join of the card on the inside, so main image in place.
Then I wanted something a little bit different, so I cut small Rhombus shapes from some of Debbees paper, which, lucky for me, I had actually printed on paper, and made small Bunting with, which I threaded onto some invisible jewelry cord, and then added some lettered peel offs in Purple, to make the words "Happy Birthday", separated them into the 2 separate words, and leaving a bit of slack, fixed it across the gatefold, and then split the second main image in two, and mounted that over the ends of the cord.
Next came the pop up part, this is easy as its a tube of card, in a square or rectangle shape, fixed to the back of each figure, the lengths can vary as you want to make some perspective, but make sure that it doesnt stick over the edges of the "pop-up". Then glue it securely to the front of the main image, and the floor of the easel, so it is glued in 3 places. At this point I would suggest using a wet glue, one that bonds the surfaces properly, as you dont want the bits to fall off!! (I use the My Craft Studio Everyday glue, but thats my preference, as I havent found another wet glue that works as well as yet!!, You can get that here .)
On the back of the card, I placed 2 strips of the remaining papers, and then stamped and embossed the sentiment, onto some of the remaining Easel card, and then used my Happy Cut with the Spellbinders Classic Postage Stamp edger die, around all four sides, edged it with a Pine promarker, as its just not possible to get an ink pad in those little gaps, and mounted it over the join.
Right I am entering this in Debbees January Challenge, and if I spot anywhere else on my trawl around Blog world tonight, that suits, I'll maybe add a few more Challenges to the list!!
well I was lucky enough to spot Debbees new Blog page, as it went live, and on her blog she has a challenge, you can find all the details Here.
So here is what I have created from the sheets debbees has kindly put up for us........
Basically I made a Gatefold pop up Easel card!
So I imported the jpegs into My Craft Studio, my Graphics program of choice, and they didnt distort, which was wonderful!! And decided which of the 4 sheets on offer I wanted to use...........That done, now to print them out, and start sticking together.
I had 2 main images, and some little people, and as I sat there looking at them it seemed to me that as one was holding a "Charge Card", that she was treating the other little person, which decided which image I was going to use.
So Images trimmed, it was time to start making the base card. (I would like to add that I would hate to post this one, as I have some wonderful Xerox card, which goes though my printer as easy as pie, so most of it is printed onto card, then mounted onto card, so the weight is a little on the heavy side!!)The images are slightly rectangular so the main image as mounted on a piece of card measuring 11 1/2"x 5 1/4", remember this is a gatefold, hence the length of the card, the second piece to form the easel measures 9 1/4" x 5 3/4".
I measured to the center of the largest piece to find the centre, using Hougie, then place the Topper on top, and measure to each side to find the score lines for the Gatefold, do leave yourself a little bit of room, just in case its slightly out, you can always trim it later. Next add the easel, I dont place YET another full piece of card behind and easel Gatefold, as it becomes quite cumbersome, though its also as sturdy as anything, so I only place enough to fix securely.
So now we have a gatefold card, with a flap that falls down when you open the gatefold. Next mount the image over the join of the card on the inside, so main image in place.
Then I wanted something a little bit different, so I cut small Rhombus shapes from some of Debbees paper, which, lucky for me, I had actually printed on paper, and made small Bunting with, which I threaded onto some invisible jewelry cord, and then added some lettered peel offs in Purple, to make the words "Happy Birthday", separated them into the 2 separate words, and leaving a bit of slack, fixed it across the gatefold, and then split the second main image in two, and mounted that over the ends of the cord.
Next came the pop up part, this is easy as its a tube of card, in a square or rectangle shape, fixed to the back of each figure, the lengths can vary as you want to make some perspective, but make sure that it doesnt stick over the edges of the "pop-up". Then glue it securely to the front of the main image, and the floor of the easel, so it is glued in 3 places. At this point I would suggest using a wet glue, one that bonds the surfaces properly, as you dont want the bits to fall off!! (I use the My Craft Studio Everyday glue, but thats my preference, as I havent found another wet glue that works as well as yet!!, You can get that here .)
On the back of the card, I placed 2 strips of the remaining papers, and then stamped and embossed the sentiment, onto some of the remaining Easel card, and then used my Happy Cut with the Spellbinders Classic Postage Stamp edger die, around all four sides, edged it with a Pine promarker, as its just not possible to get an ink pad in those little gaps, and mounted it over the join.
Right I am entering this in Debbees January Challenge, and if I spot anywhere else on my trawl around Blog world tonight, that suits, I'll maybe add a few more Challenges to the list!!
Tuesday, December 27, 2011
Still at it!!
Oh well, at least I'll be finished by June this year!!
Yesterday I decided to use all this crop of Christmas papers, lying around in the craft room, making things for NEXT Christmas, so I can clear the way for some new Christmas stash later on in the year.
No I'm not mad, well I dont think so anyway, and as some of the papers in here are quite some age, its about time I used them, and replaced with new, see method to the madness! Which means I can justify buying new Christmas stock!!
So Todays offering is a Christmas Mini Hamper.........
Which brings me to the end of the Dovecrafts Pepper and Friends 12x12 papers! Yes! One down, loads more to go!!
Ok What I used:
A Kim Sutton B-C-E Hamper Template from here traced twice onto some Linen textured Cream Card, as I have loads of it, and it needs using. Some Red Satin 1.5 cm Ribbon, from the stash, some Hearts lace from the stash, Joanna Sheen and Giordano Love this Christmas Studio Stamps, Pepper and Friends Christmas party 12x12 papers, Promarkers, a red ink pad, and a Spellbinders Fancy Tags 2 die.
So cut the template out twice, and cut the bridge once, and a handle as long as you want, and as wide as the top of the bridge. So you end up with 4 pieces.
Assemble as per Kims instructions, ( I was lucky enough to sit and watch Kim do this at the Inspirations shop, (Hunkydory HQ for those who have never heard of it) back in September I believe, and for once, as there were only a few of us I was able to sit and absorb, so I didn't even read the instructions, but remembered how she did it and what she said.
Then I proceeded to cover it with the remaining sheets of 12x12, and bits from yesterdays assembly.
I stamped the Father Christmas from the Joanna Sheen Giordano Stamp with a black pigment ink pad, twice, and then coloured it with some promarkers: Red, Almond, Sunkissed pink, Primrose, Pine, and Cool Grey 4. I used a Decoroller in gold for the button and belt fastener, liberally applied My Craft Studio Ultra Fine Crystal Glitter with a Quickie Glue Pen, and allowed it to dry.
The Handle I then added 3 strips of Red DST to it, and affixed that Hearts lace on the outer 2 strips, and placed the red satin ribbon to cover the cut ends, and it was done. I used the same technique on the flaps for the hampers, again covering the cut end of lace with the ribbon, which was then folded over behind the flap.
I Stamped the greeting from the Joanna Sheen stamp in Rocket Red Brilliance pigment ink twice, and then used the Happy Cut and Spellbinders Fancy labels 2, die number 3 to cut them out,. A bit of DST saw the Basket/Hamper finished, ready to be put away for next Christmas.
I have entered this in the
Delicious Doodles Anything Goes Challenge
My Mums Craft Shop Challenge Anything Goes
Stampin' For The Weekend Anything Goes Challenge
Everybody Art Challenge Anything goes
Secret Crafter Saturday Challenge Anything goes
Charisma Cardz Challenges Anything Goes
Yesterday I decided to use all this crop of Christmas papers, lying around in the craft room, making things for NEXT Christmas, so I can clear the way for some new Christmas stash later on in the year.
No I'm not mad, well I dont think so anyway, and as some of the papers in here are quite some age, its about time I used them, and replaced with new, see method to the madness! Which means I can justify buying new Christmas stock!!
So Todays offering is a Christmas Mini Hamper.........
Which brings me to the end of the Dovecrafts Pepper and Friends 12x12 papers! Yes! One down, loads more to go!!
Ok What I used:
A Kim Sutton B-C-E Hamper Template from here traced twice onto some Linen textured Cream Card, as I have loads of it, and it needs using. Some Red Satin 1.5 cm Ribbon, from the stash, some Hearts lace from the stash, Joanna Sheen and Giordano Love this Christmas Studio Stamps, Pepper and Friends Christmas party 12x12 papers, Promarkers, a red ink pad, and a Spellbinders Fancy Tags 2 die.
So cut the template out twice, and cut the bridge once, and a handle as long as you want, and as wide as the top of the bridge. So you end up with 4 pieces.
Assemble as per Kims instructions, ( I was lucky enough to sit and watch Kim do this at the Inspirations shop, (Hunkydory HQ for those who have never heard of it) back in September I believe, and for once, as there were only a few of us I was able to sit and absorb, so I didn't even read the instructions, but remembered how she did it and what she said.
Then I proceeded to cover it with the remaining sheets of 12x12, and bits from yesterdays assembly.
I stamped the Father Christmas from the Joanna Sheen Giordano Stamp with a black pigment ink pad, twice, and then coloured it with some promarkers: Red, Almond, Sunkissed pink, Primrose, Pine, and Cool Grey 4. I used a Decoroller in gold for the button and belt fastener, liberally applied My Craft Studio Ultra Fine Crystal Glitter with a Quickie Glue Pen, and allowed it to dry.
The Handle I then added 3 strips of Red DST to it, and affixed that Hearts lace on the outer 2 strips, and placed the red satin ribbon to cover the cut ends, and it was done. I used the same technique on the flaps for the hampers, again covering the cut end of lace with the ribbon, which was then folded over behind the flap.
I Stamped the greeting from the Joanna Sheen stamp in Rocket Red Brilliance pigment ink twice, and then used the Happy Cut and Spellbinders Fancy labels 2, die number 3 to cut them out,. A bit of DST saw the Basket/Hamper finished, ready to be put away for next Christmas.
I have entered this in the
Delicious Doodles Anything Goes Challenge
My Mums Craft Shop Challenge Anything Goes
Stampin' For The Weekend Anything Goes Challenge
Everybody Art Challenge Anything goes
Secret Crafter Saturday Challenge Anything goes
Charisma Cardz Challenges Anything Goes
Friday, December 09, 2011
Cards for my crafty friends.
Well another post, these are all the same design, as I do believe that this is unique to me........
Paying attention? Then I'll begin.........
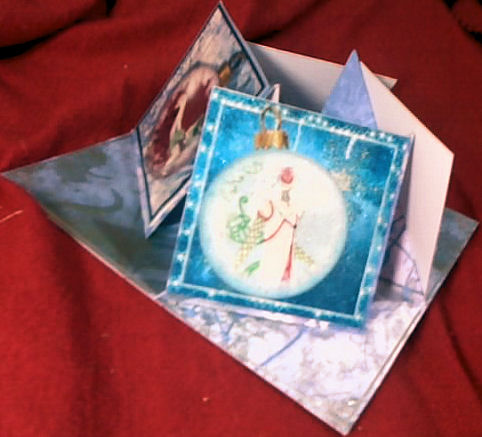
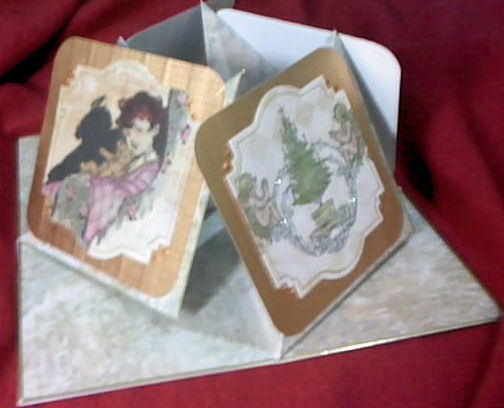
its a quadruple twisted easel card, measuring 8x8 inches. And I do believe no one else has come up with this, but its really easy to do, and I'll soon set up a new page for my own design creations on this blog, so keep your eyes open.........
This one was done using K&Co Glittered letters, Some Papermania Christmas Henbury Lane papers, Berry Merry Christmas 6x6 papers by Jennifer Ellory, and some paper from my stash, which is years old, but I think its again a papermania one.
I folded the Berry Merry papers using Mel Heatons paper Fold technique, inserted and glued the Papermania Henbury lane inside, and matted it onto some red textured card, followed by some holographic Mirri card which I bought quite a while ago at one of the Manchester Craft shows, this was way before it became popular and I got loads of packs of it for a pound.
The base was prepared using the old Papermania 12x12, and then scored at 4 inches, and again diagonally, to create the twisted easel. The bases were then stuck on with DST, and the glittered letters glued on and some peel offs added to edge the base. There are NO stoppers on this card at all. Its all to do with the way its assembled, so it then lies flat and slips into an ordinary 8x8 envelope for posting, with no extra charge for bulky letters!! Yet it is a dimensional card which displays pictures all the way around.
All these images and papers came from the My Craft Studio Christmas Classics Looking Out cd, I just used a bit of gold Holographic card to mount the images on. The images for the Toppers are printed on Pearlescent paper, and then Ultra fine Crystal Glitter was liberally applied.
This one is again all My Craft Studio, but this time the Walk in Winter Wonderland Cd. I printed the Fairy Baubles onto Acetate, and liberally coated the inky side with Crafters Companion Gold Spray and Sparkle to seal it, mounted the images to some white cardstock. Then on the outside of the acetate image I used a versa mark pen, and some gold Pearlescent embossing powder to edge the baubles, and some glittered Gold embossing Powder for the bauble tops.
Again MCS Winter Wishes Cd this time, printed on supersmooth Xerox 250gsm card, I got a full ream of this wonderful card for £7.99 from everycraftsapound.co.uk, a few weeks ago, and it is superb in both my inkjet and my laser printer. I actually printed the images twice, one slightly larger than the other, and then layered the smaller image on top of the larger one using DST . I also ran round the edge of each topper with a silver paint pen, to finish the edges off nicely. Then I used glitter, Crystal Accents, Fluffy Stuff, and also some mica powder in paint form to highlight various snowflakes throughout the images.
These images and paper were taken from makinghandmadecards.com, where I am a member, and this is from the Vintage Quick Christmas Cards download. I used Whispers Dual tip Markers and a water brush to colour the images, Highlighted small areas with Cosmic Shimmer Mica inks, and then used the Spellbinders Labels 22 with the Happy Cut to cut them out.
I then mounted them onto some C&C textured Gold Cardstock, and used Cosmic Shimmer, Olympic Gold Pearlescent Glue which dies dimensional, to create pearls of gold, and used Crystal Glitter to highlight areas. The the old corner chomper by We R Memory Keepers came out to play, and I used the 1/2 inch end.
This one used Crafters Companion Christmas Humphrey's Corner images and backing papers. I cut each image out using the lattice rectangles by Spellbinders, and matted them onto some Green patterned Mirri. each image has at least one area which was brightened with Cosmic Shimmer Mica inks, then Crystal Glitter, and MCS Snow was applied. The base was brightened up using the edges of some Holographic Peel offs, you know the straight bits down the sides, well "waste not, want not" as the old saying goes.
And last but not least..
Again Humphrey's Corner Christmas CD by Crafters Companion, some red printed cardstock, some holographic silver mirri card, and Cosmic Shimmer inks, and Crystal Glitter. These were cut using Sizzix circle dies, and the base was trimmed with some silver holographic peel offs and corners for interest.
Phew that took some time to write, as unbeknownst to you lot reading this, youngest had inserted himself into my crafting chair, and was making some Christmas cards..........." Mum....how do I ? Can you help.......Can you do this bit..........can you heat this? Can I borrow your mouse mat?
yep think you get the idea now lol. But here's one of his cards that he has just made..........
Not too bad for a nine year old, but I need to work on his stamping a bit I think!
Paying attention? Then I'll begin.........
its a quadruple twisted easel card, measuring 8x8 inches. And I do believe no one else has come up with this, but its really easy to do, and I'll soon set up a new page for my own design creations on this blog, so keep your eyes open.........
This one was done using K&Co Glittered letters, Some Papermania Christmas Henbury Lane papers, Berry Merry Christmas 6x6 papers by Jennifer Ellory, and some paper from my stash, which is years old, but I think its again a papermania one.
I folded the Berry Merry papers using Mel Heatons paper Fold technique, inserted and glued the Papermania Henbury lane inside, and matted it onto some red textured card, followed by some holographic Mirri card which I bought quite a while ago at one of the Manchester Craft shows, this was way before it became popular and I got loads of packs of it for a pound.
The base was prepared using the old Papermania 12x12, and then scored at 4 inches, and again diagonally, to create the twisted easel. The bases were then stuck on with DST, and the glittered letters glued on and some peel offs added to edge the base. There are NO stoppers on this card at all. Its all to do with the way its assembled, so it then lies flat and slips into an ordinary 8x8 envelope for posting, with no extra charge for bulky letters!! Yet it is a dimensional card which displays pictures all the way around.
All these images and papers came from the My Craft Studio Christmas Classics Looking Out cd, I just used a bit of gold Holographic card to mount the images on. The images for the Toppers are printed on Pearlescent paper, and then Ultra fine Crystal Glitter was liberally applied.
This one is again all My Craft Studio, but this time the Walk in Winter Wonderland Cd. I printed the Fairy Baubles onto Acetate, and liberally coated the inky side with Crafters Companion Gold Spray and Sparkle to seal it, mounted the images to some white cardstock. Then on the outside of the acetate image I used a versa mark pen, and some gold Pearlescent embossing powder to edge the baubles, and some glittered Gold embossing Powder for the bauble tops.
Again MCS Winter Wishes Cd this time, printed on supersmooth Xerox 250gsm card, I got a full ream of this wonderful card for £7.99 from everycraftsapound.co.uk, a few weeks ago, and it is superb in both my inkjet and my laser printer. I actually printed the images twice, one slightly larger than the other, and then layered the smaller image on top of the larger one using DST . I also ran round the edge of each topper with a silver paint pen, to finish the edges off nicely. Then I used glitter, Crystal Accents, Fluffy Stuff, and also some mica powder in paint form to highlight various snowflakes throughout the images.
These images and paper were taken from makinghandmadecards.com, where I am a member, and this is from the Vintage Quick Christmas Cards download. I used Whispers Dual tip Markers and a water brush to colour the images, Highlighted small areas with Cosmic Shimmer Mica inks, and then used the Spellbinders Labels 22 with the Happy Cut to cut them out.
I then mounted them onto some C&C textured Gold Cardstock, and used Cosmic Shimmer, Olympic Gold Pearlescent Glue which dies dimensional, to create pearls of gold, and used Crystal Glitter to highlight areas. The the old corner chomper by We R Memory Keepers came out to play, and I used the 1/2 inch end.
This one used Crafters Companion Christmas Humphrey's Corner images and backing papers. I cut each image out using the lattice rectangles by Spellbinders, and matted them onto some Green patterned Mirri. each image has at least one area which was brightened with Cosmic Shimmer Mica inks, then Crystal Glitter, and MCS Snow was applied. The base was brightened up using the edges of some Holographic Peel offs, you know the straight bits down the sides, well "waste not, want not" as the old saying goes.
And last but not least..
Phew that took some time to write, as unbeknownst to you lot reading this, youngest had inserted himself into my crafting chair, and was making some Christmas cards..........." Mum....how do I ? Can you help.......Can you do this bit..........can you heat this? Can I borrow your mouse mat?
yep think you get the idea now lol. But here's one of his cards that he has just made..........
Not too bad for a nine year old, but I need to work on his stamping a bit I think!
Thursday, December 08, 2011
So what have I been up to?
Hmmn, now lets see what I can actually post!
okay...some are still waiting to go to various people who might check my blog, but I think I should be ok posting these cards, as the recipients wont know to look here, so if you're peeking Linda, neither of these are destined for you!!!
Hmmn so what did I use? Oh yes! White silk art A3 card, 300gsm, Cream pearlised cardstock, 300gsm, green card stock 350gsm, white pearlised paper 120gsm, green Mirri card, Ribbon, pearlised shell button, die cut flowers, mouldable plastic leaves, gold embossing powder, green detail embossing powder, Versamark ink pad, Cosmic shimmer, Stamps away Mica mist, A4 Stamps Away leaf mask, Hunkydory Cream Holly Flourish cardstock 300gsm, bits from stash, Happy Cut, Spellbinders dies and embossibilities.
so....A3 folded in half, for card base. Green cardstock covered with diagonal strips of DST, and then alternately glittered with Gold and light green glitter. This re-inforced the base, and provided a tie in with the darker Holly Leaves on the main card.
Next I used the Spellbinders Fancy Flourish Embossabilities on one sheet of the cream pearlised cardstock, and cut it using the Grand Fancy Frames by Go Kreate. Then I used the A4 Leaf mask from Stamps Away, and embossed it, then sprayed with Stamps away Emerald Green Mica Mist, before removing the mask. Then I used the first sheet and some shaker Tape to create a shaker card topper, using Hunkydory Snowfall Acetate, and bits from the stash for the shaker elements. Cosmic Shimmer Olympic Gold PVA for the pearls round the edge of the shaker.
Cream Pearlised cardstock was then cut using the poor old Happy Cut (It really took a beating making this card!), using the Lattice Rectangles form Spellbinders, and embossed with the Fancy Flourish embossabilities die.then I carefully used the versamark inkpad through the die and then used the green detail powder over the top and embossed it . I then distressed it using the same embossibility die and versamark, but with Gold pearlescent embossing powder. I used the sizzix fancy frames to create 2 small toppers, one of green cardstock, which I then ran a gold paint pen round the side of, and some plain white cardstock, which I tripple embossed with some antique Gold embossing powder, into which I stamped Happy Christmas.
I used the spellbinders Poinsettia dies and some emerald green Mica Mist with some square headed brass brads from my stash, and a die cut paper Flower expert Rose (My Crfat Studio). Some die cut Ivy leaves, and some Mouldable Plastic Holly (MCS), with a die cut green mirri holly leaf, again a Spellbinders die.
Some cream/gold organza flowers from my stash, some trimming from the stash (coz I cant remember what the bead things on the clear plastic are called), and some ribbon threaded through a shell button to finish the Topper.
The Stopper on the base is made from the Grand Hexagonal Petal Envelope die, again by Spellbinders, it was again embossed with the Stamps Away Leaf Mask, and I distressed the inside of the envelope with Tim Holtz Antique Linen Distress ink before writing the greeting in the middle of the Envelope. I fixed that to the base of the card with Pinflair.
Basically, a LOT of work, lol, and its still not being sent to you Linda!! It was part of a Christmas card swap we arranged in the My Craft Studio Platinum Club, and Hubby wasn't overly impressed with what it cost to post either lol!
Next up is a commission for the Pet shop Owners Daughter.
This is a design By Debbie Moore, from the new Pick of the Week on Create and Craft, which arrived today!
I don't normally go for Debbie Moore, but this one was an interesting idea....Grotto Cards!
I wasnt happy with the colours on this, so I did import it into a pdf manipulation program, and then into My Craft Studio, who's software is so easy for me to use, I really cant get to grips with other graphics programs, too many buttons and switches for me!! So If I want to do something different I always use MCS, hence why it crops up so often in my posts.
So I wanted to do a card for a 17yr old girl for Christmas from her Father, all I have is her name and age........Ta Jimmy that helps alot!!
So this Debbie Moore CD seemed to offer possibilities. Firstly, I didn't like the original background, which was Mushrooms, and Snowdrops, so I imported an image into MCS from their Walk in Winter Wonderland CD, a snowy cottage, perfect, but it was blue. hmmn ok, then change the girls dress to blue then. I imported the template design from the DM cd into MCS, and cut out the middle so I could fit the image to the template. That done, it was a simple matter to then print and cut out the background image, which is marked with fold and score lines. I sprayed the whole creation with Crafters Companion Gold Spray and Sparkle, and cut out the decoupage. The Fairys wings, are highlighted with cosmic shimmer Midnight Blue Mica Ink, and the Blue Tit is highlighted with Denim and Sunrise Yellow Mica inks. The Snowdrops got a touch of Crystal Lacquer, and it folds VERY flat, and you can make the envelope boxes from the Debbie Moore Cd, although I do think it will be flat enough to go in a C5 envelope.
There is a box underneath to help support the whole structure, though it is very sturdy in itself, and that is where the sentiment is but you cant see it on the pictures unfortunately, and you can also make presentation boxes for the cards, which look fabulous I must admit,, but I havent done that with this one, as I'm not sure whether this will please the Pet Shop Owner , and he may want to post it, in which case, a display/presentation box will be too bulky.
Right one last thing for tonight.........a friend of mine, the infamous Linda, would love to reach 175 Followers, and is offering candy on her blog Here so please pop along and have a peek, she's doing really well, doing some DT work, and getting Blog awards.
I would really like to thank my handful of followers, you are great guys and girls, and I really appreciate your support and comments, thanks guys, mmwah!
okay...some are still waiting to go to various people who might check my blog, but I think I should be ok posting these cards, as the recipients wont know to look here, so if you're peeking Linda, neither of these are destined for you!!!
Hmmn so what did I use? Oh yes! White silk art A3 card, 300gsm, Cream pearlised cardstock, 300gsm, green card stock 350gsm, white pearlised paper 120gsm, green Mirri card, Ribbon, pearlised shell button, die cut flowers, mouldable plastic leaves, gold embossing powder, green detail embossing powder, Versamark ink pad, Cosmic shimmer, Stamps away Mica mist, A4 Stamps Away leaf mask, Hunkydory Cream Holly Flourish cardstock 300gsm, bits from stash, Happy Cut, Spellbinders dies and embossibilities.
so....A3 folded in half, for card base. Green cardstock covered with diagonal strips of DST, and then alternately glittered with Gold and light green glitter. This re-inforced the base, and provided a tie in with the darker Holly Leaves on the main card.
Next I used the Spellbinders Fancy Flourish Embossabilities on one sheet of the cream pearlised cardstock, and cut it using the Grand Fancy Frames by Go Kreate. Then I used the A4 Leaf mask from Stamps Away, and embossed it, then sprayed with Stamps away Emerald Green Mica Mist, before removing the mask. Then I used the first sheet and some shaker Tape to create a shaker card topper, using Hunkydory Snowfall Acetate, and bits from the stash for the shaker elements. Cosmic Shimmer Olympic Gold PVA for the pearls round the edge of the shaker.
Cream Pearlised cardstock was then cut using the poor old Happy Cut (It really took a beating making this card!), using the Lattice Rectangles form Spellbinders, and embossed with the Fancy Flourish embossabilities die.then I carefully used the versamark inkpad through the die and then used the green detail powder over the top and embossed it . I then distressed it using the same embossibility die and versamark, but with Gold pearlescent embossing powder. I used the sizzix fancy frames to create 2 small toppers, one of green cardstock, which I then ran a gold paint pen round the side of, and some plain white cardstock, which I tripple embossed with some antique Gold embossing powder, into which I stamped Happy Christmas.
I used the spellbinders Poinsettia dies and some emerald green Mica Mist with some square headed brass brads from my stash, and a die cut paper Flower expert Rose (My Crfat Studio). Some die cut Ivy leaves, and some Mouldable Plastic Holly (MCS), with a die cut green mirri holly leaf, again a Spellbinders die.
Some cream/gold organza flowers from my stash, some trimming from the stash (coz I cant remember what the bead things on the clear plastic are called), and some ribbon threaded through a shell button to finish the Topper.
The Stopper on the base is made from the Grand Hexagonal Petal Envelope die, again by Spellbinders, it was again embossed with the Stamps Away Leaf Mask, and I distressed the inside of the envelope with Tim Holtz Antique Linen Distress ink before writing the greeting in the middle of the Envelope. I fixed that to the base of the card with Pinflair.
Basically, a LOT of work, lol, and its still not being sent to you Linda!! It was part of a Christmas card swap we arranged in the My Craft Studio Platinum Club, and Hubby wasn't overly impressed with what it cost to post either lol!
Next up is a commission for the Pet shop Owners Daughter.
This is a design By Debbie Moore, from the new Pick of the Week on Create and Craft, which arrived today!
I don't normally go for Debbie Moore, but this one was an interesting idea....Grotto Cards!
I wasnt happy with the colours on this, so I did import it into a pdf manipulation program, and then into My Craft Studio, who's software is so easy for me to use, I really cant get to grips with other graphics programs, too many buttons and switches for me!! So If I want to do something different I always use MCS, hence why it crops up so often in my posts.
So I wanted to do a card for a 17yr old girl for Christmas from her Father, all I have is her name and age........Ta Jimmy that helps alot!!
So this Debbie Moore CD seemed to offer possibilities. Firstly, I didn't like the original background, which was Mushrooms, and Snowdrops, so I imported an image into MCS from their Walk in Winter Wonderland CD, a snowy cottage, perfect, but it was blue. hmmn ok, then change the girls dress to blue then. I imported the template design from the DM cd into MCS, and cut out the middle so I could fit the image to the template. That done, it was a simple matter to then print and cut out the background image, which is marked with fold and score lines. I sprayed the whole creation with Crafters Companion Gold Spray and Sparkle, and cut out the decoupage. The Fairys wings, are highlighted with cosmic shimmer Midnight Blue Mica Ink, and the Blue Tit is highlighted with Denim and Sunrise Yellow Mica inks. The Snowdrops got a touch of Crystal Lacquer, and it folds VERY flat, and you can make the envelope boxes from the Debbie Moore Cd, although I do think it will be flat enough to go in a C5 envelope.
There is a box underneath to help support the whole structure, though it is very sturdy in itself, and that is where the sentiment is but you cant see it on the pictures unfortunately, and you can also make presentation boxes for the cards, which look fabulous I must admit,, but I havent done that with this one, as I'm not sure whether this will please the Pet Shop Owner , and he may want to post it, in which case, a display/presentation box will be too bulky.
Right one last thing for tonight.........a friend of mine, the infamous Linda, would love to reach 175 Followers, and is offering candy on her blog Here so please pop along and have a peek, she's doing really well, doing some DT work, and getting Blog awards.
I would really like to thank my handful of followers, you are great guys and girls, and I really appreciate your support and comments, thanks guys, mmwah!
Tuesday, November 22, 2011
WOYWW
Hi all,
well I am back nearly to normal having had a bit of a disaster with my back, hence I didn't manage to post at all for about 10 days! Sorry this is a bit photo heavy, as I haven't posted for a while.
So Whats on my Work desk? ( if you have no idea what I am on about, then please hop along to Julias Page, Here and all will become as clear as muck lol)
I have finally managed to pluck up enough courage to attack my Hunky Dory collection! That's what! Boy did that take some doing!!! So on display are all Hunky Dory... Rockin Snow globes, now I have found the domes I can finish these, and umpteen Toppers and card ribbons just waiting to be made into cards. I did the easy ones first, lol, now I am having to get creative, yippee!! I did have a very large green toy box full of Hunky Dory Christmas,
now all that is left is the Foiled card stock, and the backing papers!! And a couple of Packs I am saving as emergency stash, just in case I need to produce a Christmas card toot suite!
Oh Dear! You can see the state of my carpet! All those little white backing squares from the foam pads, the backing from the double sided sticky tape, and various slivers of off cuts! What a mess!! In my defence the larger bits are from my non recycle-able bin, which my Rottwieller pup likes to raid for bits to chew on, little blighter!!
So what was in the green box, is slowly becoming stuff like this:


This is possibly, a new style of card, as I haven't seen it anywhere else. It just came to me as I was making the card up, this is the front cover....
And this is the inside, or card proper. I apologise for the glare, but its the new light. This is just one of the kits from Hunky Dory Christmas Contemporary selection.
This is from their traditional range.
And this next one has cheap wired silver ribbon, promarkered with Indigo Blue. And I used the Large Spellbinders Lace Doily motif die on the Hunky Dory Blue foiled card stock to create the mat.
All of these are using the matching Toppers and Backing papers card stock from Hunky Dory. The card stock from hunky Dory tends to be in the region of 350gsm, and the papers are generally 180gsm, so good weights for working with.
This one is a full A4 sized backing paper, backed onto some 300 gsm Silk Art Card. And very heavy on Yellow Gem Stars from my stash, nearly ran out!!
This one is using the Classic Bracket edgebilities Die from Spell Binders with the Hunky Dory Backing paper, and some green card stock from my stash.
And this one used the Go Kreate frame Frilly 10 XXL die, and my faithful Papermania snowfall embossing folder
Hunky Dorys Acetate cards on their snowfall foiled acetate.
And finally one of the Small Toppers on their pre cut card base.
But as I was playing with the edegebilities on my Happy Cut today, and making a right mess of it I must say, my youngest asked if I would help him make a card for a friend of his who is ill. So he decided that Flowers, mums thrown away piece of card, a 6x6 backing paper, some cream ribbon, and some butterflies, were what he wanted to use, but how to get it all together? The problem is that at the moment I have Christmas stock only out to play with, so his choices were limited.
In the end this is what I managed to concoct for him using his selections.
Mums thrown away Pearlised 350 gsm card, where she messed up with the edgebilities, some flowers just arrived from the Glitter Girls Flower keepsake assorted and Ruby Crush boxes, Some My Craft Studio Crystal Illusions Butterflies, 3 cheap ball headed pins (3 wheels for £1 from Poundland), and some paper and ribbon from my stash. Yes I know the Butterfly Topper is wonky, but that's the way he wanted it lol.
But while I have been lying down, getting very bored I haven't been entirely lazy, heres the 3 remaining paper folded decorations, unfortunately the Rottie pup ran off with one while I wasn't paying attention!!
They all have 2 things in common............. 1. They are all from squares of paper folded into well squares obviously, using 16 smaller squares to reduce the size by half, so a 12x12 becomes a 6x6 when its finished. as demonstrated by Mel Heaton, on C&C. and 2. They all use some of the Glittered Letters that were in my goody bag from Samuel Taylors.
The first one, has small pictures from the Classic Christmas CD's by My Craft Studio, the second, is using some 6x6 papers from my stash, with the Iron Works star die, and the Snowflake pendant dies, from Spell Binders, and some die cuts from my stash, also some lettering and shadow mats cut on the Craft Robo/Silhouette SD, ( Mines a weird one as it was manufactured during the re-branding, so its the Silhouette SD machine, but has the Craft Robo logo, lol) and the third using the Large Lace doily motif die and the Large Holly Motif die.
The one the Rottie ran off with was Peace, which isn't what he got when I found out what he was chewing on!!!
Right off to see if I can get on the list early this time lol
Happy WOYWW everyone,
well I am back nearly to normal having had a bit of a disaster with my back, hence I didn't manage to post at all for about 10 days! Sorry this is a bit photo heavy, as I haven't posted for a while.
So Whats on my Work desk? ( if you have no idea what I am on about, then please hop along to Julias Page, Here and all will become as clear as muck lol)
I have finally managed to pluck up enough courage to attack my Hunky Dory collection! That's what! Boy did that take some doing!!! So on display are all Hunky Dory... Rockin Snow globes, now I have found the domes I can finish these, and umpteen Toppers and card ribbons just waiting to be made into cards. I did the easy ones first, lol, now I am having to get creative, yippee!! I did have a very large green toy box full of Hunky Dory Christmas,
now all that is left is the Foiled card stock, and the backing papers!! And a couple of Packs I am saving as emergency stash, just in case I need to produce a Christmas card toot suite!
Oh Dear! You can see the state of my carpet! All those little white backing squares from the foam pads, the backing from the double sided sticky tape, and various slivers of off cuts! What a mess!! In my defence the larger bits are from my non recycle-able bin, which my Rottwieller pup likes to raid for bits to chew on, little blighter!!
So what was in the green box, is slowly becoming stuff like this:


This is possibly, a new style of card, as I haven't seen it anywhere else. It just came to me as I was making the card up, this is the front cover....
And this is the inside, or card proper. I apologise for the glare, but its the new light. This is just one of the kits from Hunky Dory Christmas Contemporary selection.
This is from their traditional range.
And this next one has cheap wired silver ribbon, promarkered with Indigo Blue. And I used the Large Spellbinders Lace Doily motif die on the Hunky Dory Blue foiled card stock to create the mat.
All of these are using the matching Toppers and Backing papers card stock from Hunky Dory. The card stock from hunky Dory tends to be in the region of 350gsm, and the papers are generally 180gsm, so good weights for working with.
This one is a full A4 sized backing paper, backed onto some 300 gsm Silk Art Card. And very heavy on Yellow Gem Stars from my stash, nearly ran out!!This one is using the Classic Bracket edgebilities Die from Spell Binders with the Hunky Dory Backing paper, and some green card stock from my stash.
And this one used the Go Kreate frame Frilly 10 XXL die, and my faithful Papermania snowfall embossing folder
Hunky Dorys Acetate cards on their snowfall foiled acetate.
And finally one of the Small Toppers on their pre cut card base.
But as I was playing with the edegebilities on my Happy Cut today, and making a right mess of it I must say, my youngest asked if I would help him make a card for a friend of his who is ill. So he decided that Flowers, mums thrown away piece of card, a 6x6 backing paper, some cream ribbon, and some butterflies, were what he wanted to use, but how to get it all together? The problem is that at the moment I have Christmas stock only out to play with, so his choices were limited.
In the end this is what I managed to concoct for him using his selections.
Mums thrown away Pearlised 350 gsm card, where she messed up with the edgebilities, some flowers just arrived from the Glitter Girls Flower keepsake assorted and Ruby Crush boxes, Some My Craft Studio Crystal Illusions Butterflies, 3 cheap ball headed pins (3 wheels for £1 from Poundland), and some paper and ribbon from my stash. Yes I know the Butterfly Topper is wonky, but that's the way he wanted it lol.
But while I have been lying down, getting very bored I haven't been entirely lazy, heres the 3 remaining paper folded decorations, unfortunately the Rottie pup ran off with one while I wasn't paying attention!!
They all have 2 things in common............. 1. They are all from squares of paper folded into well squares obviously, using 16 smaller squares to reduce the size by half, so a 12x12 becomes a 6x6 when its finished. as demonstrated by Mel Heaton, on C&C. and 2. They all use some of the Glittered Letters that were in my goody bag from Samuel Taylors.
The first one, has small pictures from the Classic Christmas CD's by My Craft Studio, the second, is using some 6x6 papers from my stash, with the Iron Works star die, and the Snowflake pendant dies, from Spell Binders, and some die cuts from my stash, also some lettering and shadow mats cut on the Craft Robo/Silhouette SD, ( Mines a weird one as it was manufactured during the re-branding, so its the Silhouette SD machine, but has the Craft Robo logo, lol) and the third using the Large Lace doily motif die and the Large Holly Motif die.
The one the Rottie ran off with was Peace, which isn't what he got when I found out what he was chewing on!!!
Right off to see if I can get on the list early this time lol
Happy WOYWW everyone,
Subscribe to:
Posts (Atom)